In this Flask article we want to learn How to Use Flask Built-In Authentication System, Flask is popular web framework for building web applications in Python. one of its best features is its built-in authentication system, which can be used to manage user accounts, access control, and authentication workflows. in this article we want to talk how to use Flask authentication system to build secure login page for your web application.
How to Use Flask Built-In Authentication System
First of all we need to install Flask, Flask-Login and SQLAlchemy
|
1 |
pip install Flask |
|
1 |
pip install Flask-Login |
|
1 |
pip install flask_sqlalchemy |
Now we need to import our required modules from Flask and Flask-Login, flask_login module provides us with necessary tools for authentication and authorization in our Flask application.
|
1 2 |
from flask import Flask, render_template, request from flask_login import LoginManager, login_user, current_user, login_required, logout_user |
After that we need to create new instance of the Flask class and set secret key:
|
1 2 |
app = Flask(__name__) app.secret_key = 'my_secret_key' |
Next step is to define the User model. User model is responsible for storing user information, such as usernames, passwords, and email addresses. we will use SQLAlchemy ORM to create and interact with our database, and in here we are using sqlite database.
|
1 2 3 4 5 6 7 8 9 10 11 12 13 14 15 16 17 18 19 20 21 22 |
from flask_sqlalchemy import SQLAlchemy from werkzeug.security import generate_password_hash, check_password_hash app.config['SQLALCHEMY_DATABASE_URI'] = 'sqlite:///users.db' db = SQLAlchemy(app) class User(db.Model, UserMixin): id = db.Column(db.Integer, primary_key=True) username = db.Column(db.String(80), unique=True, nullable=False) email = db.Column(db.String(120), unique=True, nullable=False) password = db.Column(db.String(255), nullable=False) is_active = db.Column(db.Boolean, default=True) def __repr__(self): return '<User %r>' % self.username def set_password(self, password): self.password = generate_password_hash(password) def check_password(self, password): return check_password_hash(self.password, password) |
In the above code we have defined a User class that extends from db.Model. User class has four properties, id, username, email and password. we have also defined two methods: set_password() and check_password(), which will be used to hash and check passwords.
Next step is to initialize Login Manager. Login Manager is responsible for managing the user session, logging users in and out and handling authentication, in this code we have initialized Login Manager and set the login view to login. we also defined user_loader function that returns the user associated with given user_id.
|
1 2 3 4 5 6 7 |
login_manager = LoginManager() login_manager.login_view = 'login' login_manager.init_app(app) @login_manager.user_loader def load_user(user_id): return User.query.get(int(user_id)) |
Now that we have the User model and Login Manager set up, we can create the login and logout routes.
|
1 2 3 4 5 6 7 8 9 10 11 12 13 14 15 16 17 18 19 20 21 22 23 24 25 26 27 |
@app.route('/login', methods=['GET', 'POST']) def login(): if current_user.is_authenticated: return redirect(url_for('index')) if request.method == 'POST': username = request.form['username'] password = request.form['password'] remember = True if request.form.get('remember') else False user = User.query.filter_by(username=username).first() if not user or not user.check_password(password): flash('Invalid username or password') return redirect(url_for('login')) login_user(user, remember=remember) return redirect(url_for('index')) return render_template('login.html') @app.route('/logout') @login_required def logout(): logout_user() return redirect(url_for('index')) |
This is our user signup code in Flask Authentication
|
1 2 3 4 5 6 7 8 9 10 11 12 13 14 15 16 17 18 19 20 21 22 23 |
@app.route('/signup', methods=['GET', 'POST']) def signup(): if request.method == 'POST': username = request.form['username'] email = request.form['email'] password = request.form['password'] user = User.query.filter_by(username=username).first() if user: flash('Username already exists') return redirect(url_for('signup')) new_user = User(username=username, email=email) new_user.set_password(password) db.session.add(new_user) db.session.commit() flash('Account created successfully') return redirect(url_for('login')) return render_template('signup.html') |
So now let’s create the complete code, this the code for app.py file
|
1 2 3 4 5 6 7 8 9 10 11 12 13 14 15 16 17 18 19 20 21 22 23 24 25 26 27 28 29 30 31 32 33 34 35 36 37 38 39 40 41 42 43 44 45 46 47 48 49 50 51 52 53 54 55 56 57 58 59 60 61 62 63 64 65 66 67 68 69 70 71 72 73 74 75 76 77 78 79 80 81 82 83 84 85 86 87 88 89 90 91 92 93 94 95 96 97 98 99 100 101 102 103 104 |
from flask import Flask, render_template, request, redirect, url_for, flash from flask_login import LoginManager, login_user, UserMixin,current_user, login_required, logout_user from flask_sqlalchemy import SQLAlchemy from werkzeug.security import generate_password_hash, check_password_hash app = Flask(__name__) app.secret_key = 'my_secret_key' # configure the database URI app.config['SQLALCHEMY_DATABASE_URI'] = 'sqlite:///users.db' # initialize the database db = SQLAlchemy(app) # initialize the Login Manager login_manager = LoginManager() login_manager.login_view = 'login' login_manager.init_app(app) # define the User model class User(db.Model, UserMixin): id = db.Column(db.Integer, primary_key=True) username = db.Column(db.String(80), unique=True, nullable=False) email = db.Column(db.String(120), unique=True, nullable=False) password = db.Column(db.String(255), nullable=False) is_active = db.Column(db.Boolean, default=True) def __repr__(self): return '<User %r>' % self.username def set_password(self, password): self.password = generate_password_hash(password) def check_password(self, password): return check_password_hash(self.password, password) # user loader function @login_manager.user_loader def load_user(user_id): return User.query.get(int(user_id)) # login route @app.route('/login', methods=['GET', 'POST']) def login(): if current_user.is_authenticated: return redirect(url_for('index')) if request.method == 'POST': username = request.form['username'] password = request.form['password'] remember = True if request.form.get('remember') else False user = User.query.filter_by(username=username).first() if not user or not user.check_password(password): flash('Invalid username or password') return redirect(url_for('login')) login_user(user, remember=remember) return redirect(url_for('index')) return render_template('login.html') # logout route @app.route('/logout') @login_required def logout(): logout_user() return redirect(url_for('index')) # index route @app.route('/') @login_required def index(): return render_template('index.html') # signup route @app.route('/signup', methods=['GET', 'POST']) def signup(): if request.method == 'POST': username = request.form['username'] email = request.form['email'] password = request.form['password'] user = User.query.filter_by(username=username).first() if user: flash('Username already exists') return redirect(url_for('signup')) new_user = User(username=username, email=email) new_user.set_password(password) db.session.add(new_user) db.session.commit() flash('Account created successfully') return redirect(url_for('login')) return render_template('signup.html') if __name__ == '__main__': app.run(debug=True) |
In the above we have defined User model, initialized database and Login Manager, and creates login, logout, index and signup routes. we have also defined user_loader function, which is used by the Login Manager to load the user associated with a given user_id.
login route handles the authentication process, checking user credentials and logging them in if they are valid. logout route logs the user out of the application. index route requires the user to be logged in to access it. and lastly signup route handles the creation of new user accounts.
Now these our html files
base.html
|
1 2 3 4 5 6 7 8 9 10 11 12 13 14 15 16 17 18 19 20 21 22 23 24 25 26 27 28 29 30 31 32 33 34 35 36 37 38 39 40 41 42 43 44 45 46 47 48 49 50 51 52 53 54 |
<!doctype html> <html> <head> <title>{% block title %}{% endblock %}</title> <link rel="stylesheet" href="https://stackpath.bootstrapcdn.com/bootstrap/4.3.1/css/bootstrap.min.css"> </head> <body> <nav class="navbar navbar-expand-md navbar-dark bg-dark"> <a class="navbar-brand" href="#">Geekscoders.com</a> <button class="navbar-toggler" type="button" data-toggle="collapse" data-target="#navbarNav" aria-controls="navbarNav" aria-expanded="false" aria-label="Toggle navigation"> <span class="navbar-toggler-icon"></span> </button> <div class="collapse navbar-collapse" id="navbarNav"> <ul class="navbar-nav mr-auto"> <li class="nav-item active"> <a class="nav-link" href="{{ url_for('index') }}">Home</a> </li> </ul> <ul class="navbar-nav"> {% if current_user.is_authenticated %} <li class="nav-item"> <a class="nav-link" href="#">{{ current_user.username }}</a> </li> <li class="nav-item"> <a class="nav-link" href="{{ url_for('logout') }}">Logout</a> </li> {% else %} <li class="nav-item"> <a class="nav-link" href="{{ url_for('login') }}">Login</a> </li> <li class="nav-item"> <a class="nav-link" href="{{ url_for('signup') }}">Sign Up</a> </li> {% endif %} </ul> </div> </nav> <div class="container"> {% with messages = get_flashed_messages() %} {% if messages %} {% for message in messages %} <div class="alert alert-warning" role="alert"> {{ message }} </div> {% endfor %} {% endif %} {% endwith %} {% block content %}{% endblock %} </div> <script src="https://code.jquery.com/jquery-3.3.1.slim.min.js"></script> <script src="https://cdnjs.cloudflare.com/ajax/libs/popper.js/1.14.7/umd/popper.min.js"></script> <script src="https://stackpath.bootstrapcdn.com/bootstrap/4.3.1/js/bootstrap.min.js"></script> </body> </html> |
This is the base template that all other templates extends from that. it defines the overall structure of the HTML document including navbar, container and JavaScript libraries. it also defines content block that can be overridden in child templates. {% if current_user.is_authenticated %} block displays different links in the navbar depending on whether the user is authenticated or not.
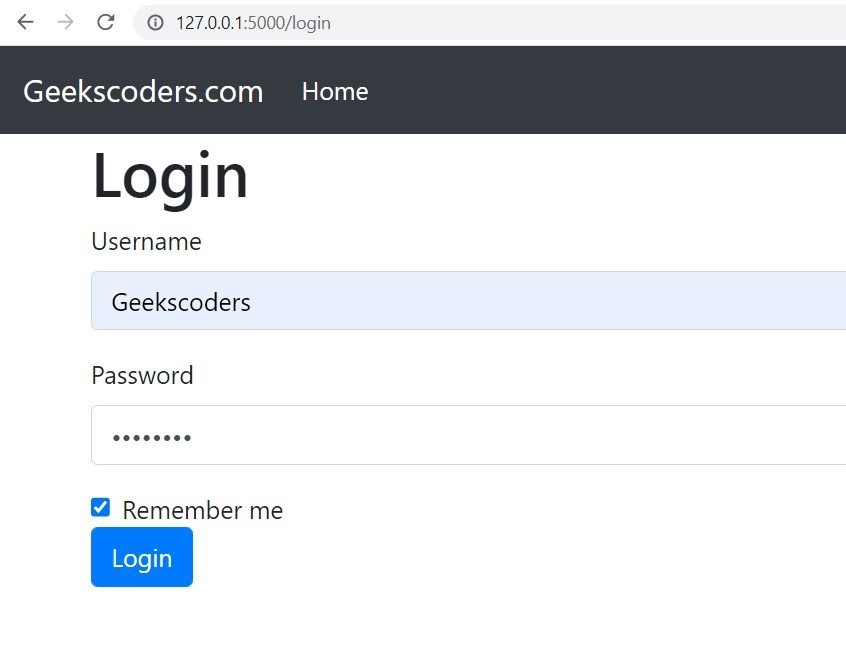
This is login.html
|
1 2 3 4 5 6 7 8 9 10 11 12 13 14 15 16 17 18 19 20 21 22 23 24 25 26 27 28 29 |
{% extends 'base.html' %} {% block content %} <h1>Login</h1> {% with messages = get_flashed_messages() %} {% if messages %} {% for message in messages %} <div class="alert alert-warning" role="alert"> {{ message }} </div> {% endfor %} {% endif %} {% endwith %} <form method="POST"> <div class="form-group"> <label for="username">Username</label> <input type="text" class="form-control" id="username" name="username" required> </div> <div class="form-group"> <label for="password">Password</label> <input type="password" class="form-control" id="password" name="password" required> </div> <div class="form-check"> <input type="checkbox" class="form-check-input" id="remember" name="remember"> <label class="form-check-label" for="remember">Remember me</label> </div> <button type="submit" class="btn btn-primary">Login</button> </form> {% endblock %} |
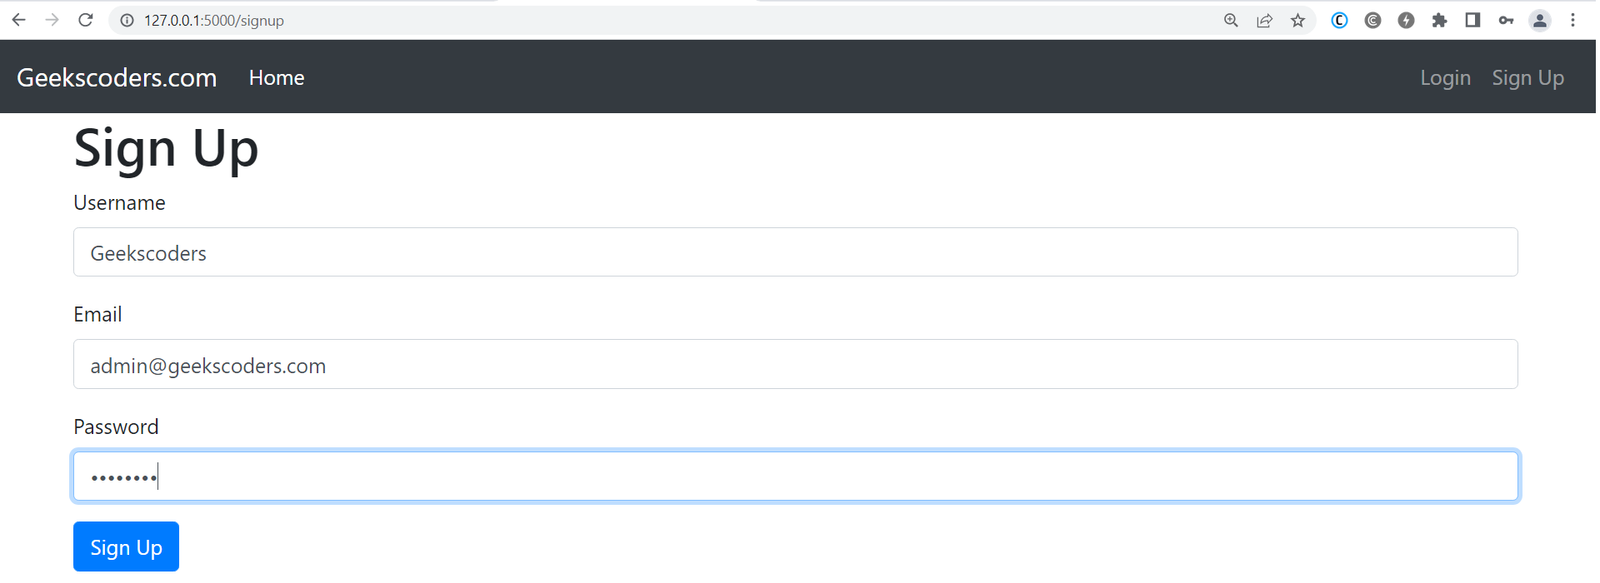
This is signup.html
|
1 2 3 4 5 6 7 8 9 10 11 12 13 14 15 16 17 18 19 20 21 22 23 24 25 26 27 28 29 |
{% extends 'base.html' %} {% block content %} <h1>Sign Up</h1> {% with messages = get_flashed_messages() %} {% if messages %} {% for message in messages %} <div class="alert alert-warning" role="alert"> {{ message }} </div> {% endfor %} {% endif %} {% endwith %} <form method="POST"> <div class="form-group"> <label for="username">Username</label> <input type="text" class="form-control" id="username" name="username" required> </div> <div class="form-group"> <label for="email">Email</label> <input type="email" class="form-control" id="email" name="email" required> </div> <div class="form-group"> <label for="password">Password</label> <input type="password" class="form-control" id="password" name="password" required> </div> <button type="submit" class="btn btn-primary">Sign Up</button> </form> {% endblock %} |
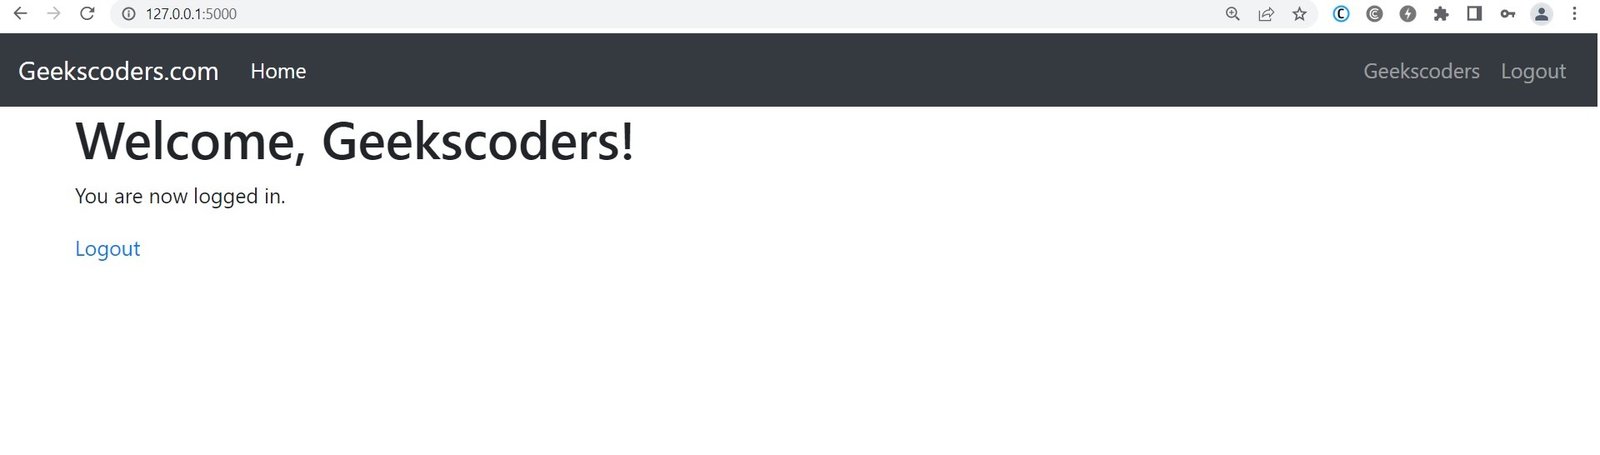
This is index.html
|
1 2 3 4 5 6 7 |
{% extends 'base.html' %} {% block content %} <h1>Welcome, {{ current_user.username }}!</h1> <p>You are now logged in.</p> <a href="{{ url_for('logout') }}">Logout</a> {% endblock %} |
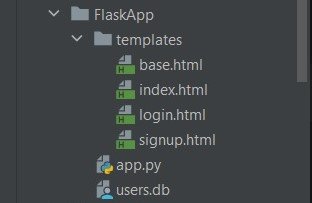
This is our Flask Project Structrure,
Also make sure that you have created your table model in the SQLite database, for doing that first you need to navigate to the project folder and open flask shell in the terminal.
|
1 |
flask shell |
After that you can run this command, it will creates users table model in your SQLite database.
|
1 2 3 |
>>> from app import db >>> db.create_all() >>> |
Run the project and this will be the pages
Signup Page
Flask Login Page
This is Index Page