In this lesson we want to learn about PySide6: The Cross-Platform GUI Framework for Python.
Introduction to PySide6
Python is high level programming language that has become one of the most popular and widely used languages. and PySide6 is set of Python bindings for the Qt cross platform application development framework.
PySide6 provides convenient and easy to use interface for creating GUI applications with Python. with PySide6 you can create modern and nice applications that runs on multiple platforms including Windows, macOS and Linux.
One of the key benefits of using PySide6 is its cross platform compatibility. by using PySide6 you can write your application once and deploy it on multiple platforms without the need to make any changes to your code. this saves your time and effort and also helps to ensure that your application looks and behaves consistently across all platforms.
Another important advantage of PySide6 is its rich set of GUI components and widgets. PySide6 provides large collection of pre built components such as buttons, labels and text boxes, that you can use to build your application user interface. and if you need to create custom widgets or components, PySide6 makes it easy to do so, thanks to its intuitive and flexible API.
PySide6 also provides powerful tools for layout management and stylesheet customization, so you can create visually appealing and responsive user interfaces that look great on any device. and with PySide6 support for Qt’s signals and slots mechanism, you can easily connect your user interface to your application’s logic and data.
In result we can say that PySide6 is powerful cross platform GUI framework for Python that makes it easy to create nice and responsive applications that run on multiple platforms. If you are beginner or an experienced developer, PySide6 has the tools and resources you need to get the job done.
How to Install PySide6
PySide6 can be installed using pip, these are the steps to install PySide6:
- Make sure that you have Python and pip installed on your system.
- Open terminal or command prompt and run the following command:
|
1 |
pip install PySide6 |
- Wait for the installation process to complete.
- After installation is completed you can verify that PySide6 is installed by running the following command:
|
1 |
pip show PySide6 |
This should display information about the PySide6 package including its version number and installation location.
Note: If you run into any issue during installation process such as missing dependencies, you may need to install additional packages or libraries. you can check PySide6 documentation or reach out to the PySide6 community for help.
Basic Window Example in PySide6
This is basic example of creating window using PySide6:
|
1 2 3 4 5 6 7 8 9 10 11 12 13 14 15 |
import sys from PySide6.QtWidgets import QApplication, QMainWindow, QLabel app = QApplication(sys.argv) window = QMainWindow() window.setWindowTitle("My First PySide6 Window") window.resize(400, 300) label = QLabel("Hello, GeeksCoders!", parent=window) label.move(150, 150) window.show() sys.exit(app.exec()) |
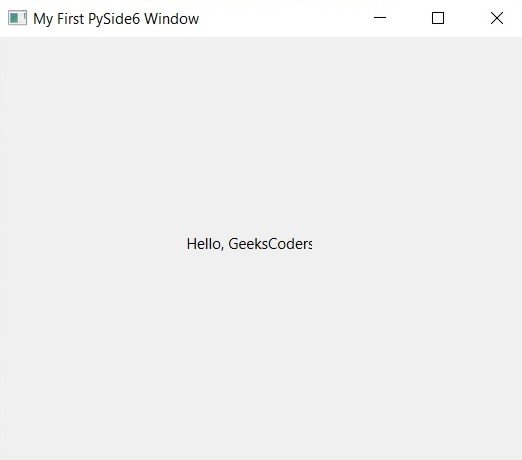
This code creates QApplication which is the main event loop for PySide6 application. after that it creates QMainWindow which is top level window for PySide6 application. we have given title to the window and there is an specific size fort he window.
After that we have created QLabel with the text “Hello, GeeksCoders!” and it is added as child widget to the main window. the label is then moved to specific position within the window.
at the end window is shown and the application’s event loop is started with app.exec().
This example provides simple demonstration of how to create PySide6 window and add widget to it. you can build upon this basic example to create more complex and feature rich applications with PySide6.
Run the complete code and this will be the result

This was just basic window now let’s add some more functionality to this window, we want to add button with signals and slots functionality to our this window.
What is Signals and Slots in PySide6 ?
Signals and Slots is a mechanism for communication between objects in the PySide6 GUI framework. It allows one object to send a signal to another object indicating that an event has occurred, and for the receiving object to handle the event by executing a designated slot.
In PySide6, signals are defined as part of a widget’s class, and slots are normal Python methods. When a signal is emitted, any connected slots are automatically executed.
For example, in the case of a button widget, you could connect the clicked signal to a slot that updates the text of a label widget. When the button is clicked, the signal is emitted, and the slot updates the label’s text.
This is an example of adding button and using signals and slots mechanism in PySide6 window:
|
1 2 3 4 5 6 7 8 9 10 11 12 13 14 15 16 17 18 19 20 21 22 23 24 25 |
import sys from PySide6.QtWidgets import QApplication, QMainWindow, QLabel, QPushButton from PySide6.QtCore import Slot app = QApplication(sys.argv) window = QMainWindow() window.setWindowTitle("My First PySide6 Window") window.resize(400, 300) label = QLabel("Hello, GeeksCoders!", parent=window) label.move(150, 150) button = QPushButton("Click Me!", parent=window) button.move(150, 200) @Slot() def on_button_clicked(): label.setText("Button was clicked!") button.clicked.connect(on_button_clicked) window.show() sys.exit(app.exec()) |
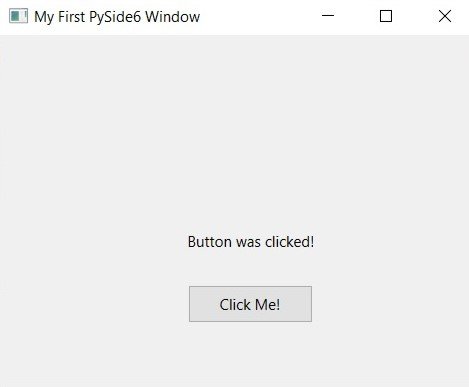
In this example QPushButton is added to the window with the text “Click Me!”. the button is positioned at specific location within the window.
on_button_clicked function is defined as slot which is PySide6 mechanism for handling events. this function sets the text of the QLabel to “Button was clicked!” when the button is clicked.
clicked signal of the button is connected to the on_button_clicked slot using the connect method. this means that when the button is clicked, the on_button_clicked function will be called.
This example demonstrates the basic usage of signals and slots mechanism in PySide6. you can use this mechanism to handle events and react to user interactions in your PySide6 applications.
Run the complete code and this will be the result

Adding Layout to PySide6
Right now we don’t have layout in our GUI app, let’s add layout to our window. this is an example of adding layout to the previous code:
|
1 2 3 4 5 6 7 8 9 10 11 12 13 14 15 16 17 18 19 20 21 22 23 24 25 26 27 28 29 30 |
import sys from PySide6.QtWidgets import QApplication, QMainWindow, QLabel, QPushButton, QVBoxLayout, QWidget from PySide6.QtCore import Slot app = QApplication(sys.argv) window = QMainWindow() window.setWindowTitle("My First PySide6 Window") window.resize(400, 300) label = QLabel("Hello, GeeksCoders!", parent=window) button = QPushButton("Click Me!", parent=window) @Slot() def on_button_clicked(): label.setText("Button was clicked!") button.clicked.connect(on_button_clicked) layout = QVBoxLayout() layout.addWidget(label) layout.addWidget(button) central_widget = QWidget() central_widget.setLayout(layout) window.setCentralWidget(central_widget) window.show() sys.exit(app.exec()) |
In this example we have created QVBoxLayout and added to QWidget. QLabel and QPushButton are added to the layout.
QWidget is set as the central widget of the QMainWindow using setCentralWidget method. this means that the layout and its widgets will be displayed in the central area of the window.
Using layout allows you to automatically manage the placement and size of your widgets based on the layout’s rules. in this case QVBoxLayout will arrange the widgets in vertical column, with the label at the top and the button at the bottom.
This example demonstrates how to use layouts to manage the placement of widgets in your PySide6 applications.
Run the complete code and this will be the result

Learn More on Python
- PyQt6: The Ultimate GUI Toolkit for Python
- Python: The Most Versatile Programming Language of the 21st Century
- Tkinter: A Beginner’s Guide to Building GUI Applications in Python
- Discover the Power of Django: The Best Web Framework for Your Next Project
- How to Earn Money with Python
- Why Flask is the Ideal Micro-Web Framework
