Do you need Python TKinter Tutorial, so this tutorial is for you, in this TKinter Tutorial we are going to talk about Build Python GUI Applications. first of all let’s talk about Python TKinter and the installation process.
What is Python TKinter ?
Python Tkinter is standard GUI (Graphical User Interface) library for Python that is included with most Python installations. it provides a simple way to create desktop applications with graphical interface using different widgets such as buttons, labels, text boxes and many more. Tkinter is easy to learn and this makes it popular choice for beginner programmers who want to create GUI applications in Python. هt also provides a rich set of features that can be extended with third party modules to create more complex and sophisticated GUIs. Tkinter is cross platform GUI library, it means that the same code can be used on different operating systems such as Windows, Linux and Mac OS X.
Python TKinter Tutorial
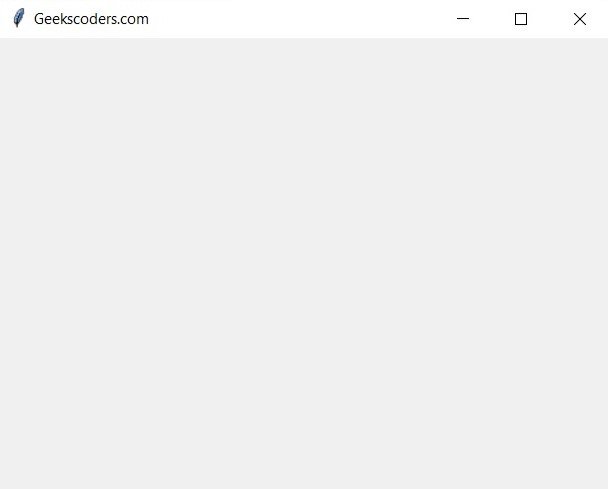
Now let’s start by Building Simple Python GUI Applications, basically we want to create basic window in Python TKinter, in the below example we have imported tkinter module and created new Tk object, which represents our main window. after that we have set the window title and its size to 500×500 pixels using the title() and geometry() methods. and lastly we enter the main event loop using the mainloop() method, which displays the window and waits for user input.
|
1 2 3 4 5 6 7 8 9 10 11 12 13 14 15 |
import tkinter as tk # create new instance of the Tk class and assign it to the # variable root root = tk.Tk() # set the title of the window to Geekscoders.com root.title("Geekscoders.com") # set the size of the window to 500x500 pixels root.geometry("500x500") # start the main event loop, which displays # the window and waits for user input root.mainloop() |
Run the code and this will be the result
So we have learned that how we can create simple GUI window with Python TKinter, now let’s use OOP, and create our window with OOP.
|
1 2 3 4 5 6 7 8 9 10 11 12 |
import tkinter as tk class MainWindow: def __init__(self, master): self.master = master master.title("Geekscoders.com") master.geometry("500x500") if __name__ == "__main__": root = tk.Tk() app = MainWindow(root) root.mainloop() |
In OOP version of the code we have created new class called MainWindow that extends from the object class. __init__() method of the MainWindow class takes master argument which represents the main window of the application. after that we have set the title and geometry of the window using the title() and geometry() methods.
in the if __name__ == “__main__”: block we have created new Tk object and assign it to the variable root. after that we creates an instance of the MainWindow class and pass root as the master argument. and lastly we enter the main event loop using the mainloop() method, which displays the window and waits for user input, if you run the code you will see the same result.
Python TKinter Widgets
In Python TKinter widgets are graphical elements that can be added to a window or frame to create user interface. examples of widgets are buttons, labels, text boxes, radio buttons, checkboxes, sliders and many more. each widget is an instance of TKinter class and has specific set of properties and methods that can be used to customize its appearance and behavior. for example you can change the color or font of a label or add an event handler function to a button that is triggered when the button is clicked. widgets can be created using the appropriate TKinter class and then added to a window or frame using layout manager such as pack(), grid() or place(). layout manager is responsible for positioning the widget within the window or frame according to a set of rules such as aligning it to the left or center, or filling the available space.
So we can say that widgets are the building blocks of any Python TKinter GUI application and understanding how to work with them is essential for creating effective and user friendly interfaces.
This is the list of important Python TKinter Widgets
| Label | A widget used to display text or an image |
| Button | A widget used to trigger an action or function when clicked. |
| Entry | A widget used to allow the user to input text. |
| Text | A widget used to display or edit multiple lines of text. |
| Frame | A container widget used to group other widgets together. |
| Checkbutton | A widget used to allow the user to select one or more options from a list. |
| Radiobutton | A widget used to allow the user to select one option from a list. |
| Scrollbar | A widget used to allow the user to scroll through the contents of another widget, such as a Text or Canvas widget. |
| Canvas | A widget used to draw graphics or diagrams. |
| Menu | A widget used to create menus and dropdown lists. |
| Spinbox | A widget used to allow the user to select a value from a range of numbers. |
| Spinbox | A widget used to allow the user to select a value from a range of numbers. |
| Listbox | A widget used to display a list of items that the user can select. |
| Scale | A widget used to allow the user to select a value from a range of numbers using a slider. |
| Message | A widget used to display a message or text that can be word-wrapped. |
| LabelFrame | A container widget used to group other widgets together and display a border around them. |
These are just some of the most commonly used widgets in Python TKinter, and there are many others to choose from depending on the needs of your GUI application.
Python TKinter Layout Managers
In Python TKinter layout managers are used to arrange widgets within container widget, such as Frame or Window. there are three main layout managers available in TKinter.
| Pack | This layout manager is used to place widgets side-by-side, with each widget occupying as much space as it needs. Widgets are added to the container widget one at a time, and they are automatically arranged in the order they are added. |
| Grid | This layout manager is used to place widgets in a grid-like pattern, with each widget occupying a specific row and column within the grid. Widgets can span multiple rows and columns, and the size of each row and column can be adjusted to accommodate the widgets. |
| Place | This layout manager is used to place widgets at specific coordinates within the container widget. Widgets are positioned relative to the top-left corner of the container widget, and their size and position must be specified explicitly. |
Each layout manager has its own strengths and weaknesses and the choice of layout manager depends on the specific needs of the GUI application. for example Pack layout manager is good for simple layouts that don’t require complex positioning, and Grid layout manager is better for more complex layouts that require more control over the position and size of each widget. Place layout manager is often used for creating custom widgets or for complex layout requirements that cannot be achieved using the other layout managers.
Now let’s create some practical examples on Python TKinter Widgets.
Python TKinter Label
In Python TKinter, a Label widget is used to display text or an image on the GUI window. It is one of the simplest and most commonly used widgets in TKinter.
|
1 2 3 4 5 6 7 8 9 10 11 12 13 14 15 16 17 18 19 20 21 22 23 |
import tkinter as tk # Create new instance of the Tk class root = tk.Tk() # Set title of the window root.title("Python TKinter Label Example") # Create new Label widget label1 = tk.Label(root, text="Welcome to Geekscoders.com") # Use the grid layout manager to place the label label1.grid(row=0, column=0) # Create another Label widget label2 = tk.Label(root, text="Learn Programmning in geekscoders.com") # Use the grid layout manager to place the label label2.grid(row=1, column=0) # Start the main event loop, which displays the window # and waits for user input root.mainloop() |
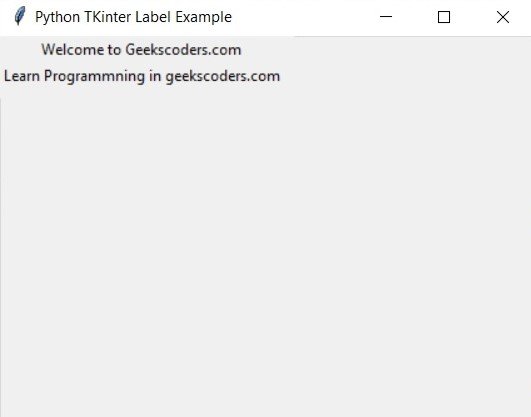
In the above example we have created two Label widgets and place them in different rows and columns of the root window using the grid layout manager. text option is used to specify the text to be displayed on each label.
Run the code and this will be the result
Python TKinter Button
Button in Python TKinter is a widget that can be clicked by the user to perform specific action. it can display text or an image and can be customized with different options such as size, color, font and many more. when the button is clicked a function or method can be called to perform a specific action such as opening new window or performing a calculation.
For creating a Button in Python TKinter you can use the Button class and specify the options you want such as the text to display on the button and the function to call when the button is clicked. Button can then be added to the main window using a layout manager such as pack or grid.
|
1 2 3 4 5 6 7 8 9 10 11 12 13 14 15 16 17 18 19 20 21 22 23 24 25 26 27 28 |
import tkinter as tk def button_click(): # Update the text property of the label to # display a text label.config(text="Welcome to geekscoders.com") # Create a new Tkinter window root = tk.Tk() # Create new Button widget.set the command option to the # button_click function. button = tk.Button(root, text="Click me!", command=button_click) # Add the button widget to the main window using the # pack geometry manager button.pack() # Create new Label widget label = tk.Label(root, text="Press the button!") # Add the label widget to the main window using the # pack geometry manager label.pack() # Start the main event loop and display # the window on the screen root.mainloop() |
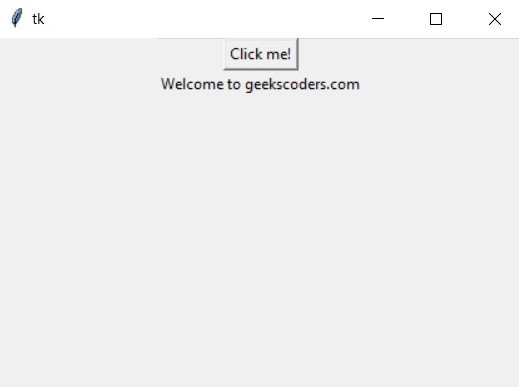
In this example we have created a Button and a function button_click that is called when the button is clicked. button_click function updates the text property of the Label widget to display the a message . we also creates a Label widget and add it to the main window using the pack layout manager.
You can also use the same code in OOP
|
1 2 3 4 5 6 7 8 9 10 11 12 13 14 15 16 17 18 19 20 21 22 23 24 25 26 |
import tkinter as tk class App: def __init__(self, master): self.master = master master.title("Button Example") # Create a Button widget self.button = tk.Button(master, text="Click me!", command=self.button_click) # Add the Button widget to the main window self.button.pack() # Create a Label widget self.label = tk.Label(master, text="Press the button!") # Add the Label widget to the main window self.label.pack() def button_click(self): # Update the text property of the Label widget self.label.config(text="Welcome to geekscoders.com") root = tk.Tk() app = App(root) root.mainloop() |
In the above example we have defined a class App that has a constructor method __init__. __init__ method takes master as its argument, which represents the main window. inside the constructor we have created a Button and a Label widget, and added them to the main window using the pack geometry manager. we have also defined a method button_click, which updates the text property of the Label widget. and lastly we have created an instance of the App class and pass it the main window root. we start the main event loop using root.mainloop(), if you run the code you will see the same result.
Run the complete code and this will be the result
Python TKinter Entry
In Python Tkinter Entry is a widget that provides single line text box for users to enter input. it can be used to get input from the user for things like usernames, passwords or other types of data. Entry widget can also be configured to show a default text value when the user has not entered any text yet. also it supports different options for formatting and validating input.
To get input from the user using an Entry widget, you can use the get() method, which returns the current value of the widget as a string. You can also use the delete() and insert() methods to modify the text displayed in the widget.
|
1 2 3 4 5 6 7 8 9 10 11 12 13 14 15 16 17 18 19 20 21 22 23 24 25 26 27 28 29 30 31 32 33 34 |
import tkinter as tk class App: def __init__(self, master): self.master = master master.title("TKinter Entry Example") # create an Entry widget and set its initial text self.entry = tk.Entry(master, width=30) self.entry.insert(0, "Enter your name here") # create Button widget and assign function to it self.button = tk.Button(master, text="Submit", command=self.submit) # create Label widget and set its initial text self.label = tk.Label(master, text="Welcome to TKinter Entry Example") # use grid layout manager to arrange the widgets self.entry.grid(row=0, column=0, padx=10, pady=10) self.button.grid(row=0, column=1, padx=10, pady=10) self.label.grid(row=1, column=0, columnspan=2, padx=10, pady=10) def submit(self): # get text entered in the Entry widget name = self.entry.get() # update Label widget with a greeting message self.label.config(text="Welcome, " + name) root = tk.Tk() my_window = App(root) root.mainloop() |
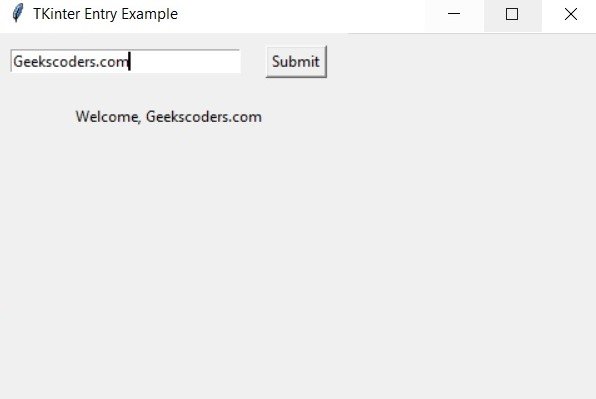
In the above example we have defined App class that represents the main window of our application. in the __init__ method we have created and arranged the widgets (Entry, Button and Label) using the grid layout manager. we have also assigned submit method to the Button widget command option. submit method retrieves the text entered in the Entry widget using the get method and updates the Label widget text property with greeting message.
Run the code and this will be the result
Python TKinter Frame
In Python Tkinter Frame is a rectangular container widget used to group other widgets together. it acts as a container for other widgets like buttons, labels and text boxes. Frame widget can be used to group multiple widgets and apply a common theme to them. it helps in organizing the layout of the widgets in the GUI.
|
1 2 3 4 5 6 7 8 9 10 11 12 13 14 15 16 17 18 19 20 21 22 23 24 25 26 27 28 29 30 31 32 33 34 35 36 37 38 39 40 |
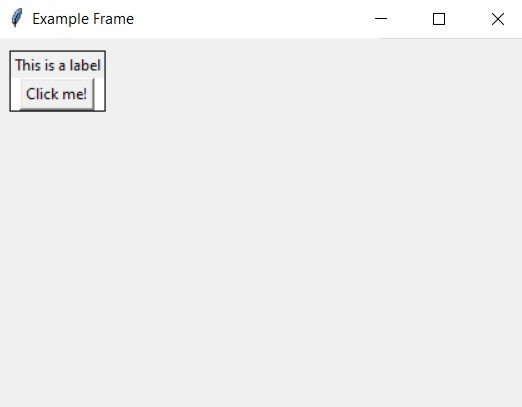
import tkinter as tk class FrameExample(tk.Frame): def __init__(self, master): super().__init__(master) # Set title of the window master.title("Example Frame") # Set size of the window master.geometry("300x300") # Create frame widget frame = tk.Frame(master, bg="white", bd=1, relief=tk.SOLID) # Add label to the frame label = tk.Label(frame, text="This is a label") # Add label to the frame using the grid geometry manager label.grid(row=0, column=0) # Add a button to the frame button = tk.Button(frame, text="Click me!") # Add the button to the frame using the grid geometry manager button.grid(row=1, column=0) # Add the frame to the main window using the # grid geometry manager frame.grid(row=0, column=0, padx=10, pady=10) if __name__ == "__main__": # Create new Tkinter window root = tk.Tk() # Create an instance of ExampleFrame frame = FrameExample(root) # Start the main event loop root.mainloop() |
In the above example we have import the tkinter module and defined a class called FrameExample which extends from tk.Frame.
after that in the constructor we have set the title and size of the main window, and then created new frame widget with white background, border of 1 pixel and solid relief.
after that we add a label and a button to the frame using the grid geometry manager which allows us to specify the row and column of each widget. and lastly we have added the frame to the main window using the grid geometry manager as well, with some padding around the edges.
Run the code and this will be the result
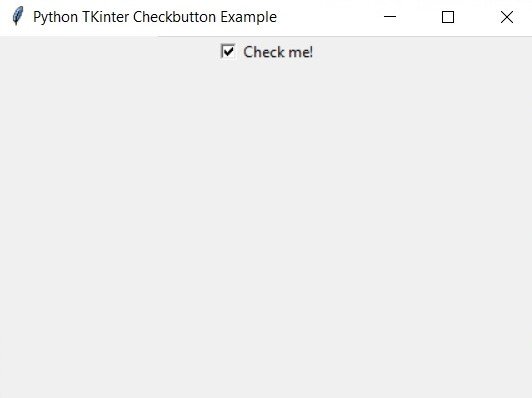
Python Tkinter Checkbutton is a widget that represents check button which allows the user to select one or more options from a list of choices. it is a part of the Tkinter module and can be used to create graphical user interfaces in Python. Checkbutton widget has a variable that can be set to a Boolean value, which indicates whether the button is checked or unchecked.
|
1 2 3 4 5 6 7 8 9 10 11 12 13 14 15 16 17 18 19 20 21 22 23 24 25 26 |
import tkinter as tk class CheckButtonExample: def __init__(self, root): # Set up the main window self.root = root self.root.title("Python TKinter Checkbutton Example") # Create Checkbutton widget with a default value of False self.checkbutton_var = tk.BooleanVar(value=False) self.checkbutton = tk.Checkbutton(self.root, text="Check me!", variable=self.checkbutton_var, command=self.print_state) # Add the Checkbutton to the main window self.checkbutton.pack() def print_state(self): # Print the current value of the Checkbutton variable print(self.checkbutton_var.get()) if __name__ == "__main__": # Create the main Tkinter window # and run the application root = tk.Tk() app = CheckButtonExample(root) root.mainloop() |
In the above example we have created CheckButtonExample class that sets up the main window and creates Checkbutton widget with default value of False. we have also created BooleanVar to store the state of the Checkbutton. when the Checkbutton is clicked print_state method is called which prints the current value of the Checkbutton variable to the console.
This will be the result
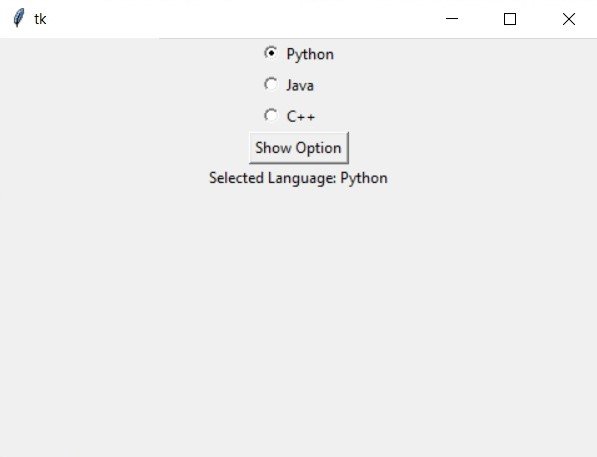
In Python TKinter Radiobutton is graphical user interface widget that allows the user to select one option from a group of options. it can be used to present the user with multiple choices that are mutually exclusive, it means that the user can only select one option at a time. when one Radiobutton is selected, any other Radiobuttons in the same group are automatically deselected. group of Radiobuttons is created by associating them with shared variable. when a user selects Radiobutton, its associated value is assigned to the shared variable. the value of shared variable can then be used in the program to determine which Radiobutton was selected.
|
1 2 3 4 5 6 7 8 9 10 11 12 13 14 15 16 17 18 19 20 21 22 23 24 25 26 27 28 29 30 31 32 33 34 35 36 37 |
import tkinter as tk class RadioExample: def __init__(self, master): # Create frame to hold Radiobuttons self.radio_frame = tk.Frame(master) self.radio_frame.pack() # Create variables to store the selected option self.selected_option = tk.StringVar() self.selected_option.set("Python") # Create three Radiobuttons with different text and values self.option1 = tk.Radiobutton(self.radio_frame, text="Python", variable=self.selected_option, value="Python") self.option1.pack(anchor="w") self.option2 = tk.Radiobutton(self.radio_frame, text="Java", variable=self.selected_option, value="Java") self.option2.pack(anchor="w") self.option3 = tk.Radiobutton(self.radio_frame, text="C++", variable=self.selected_option, value="C++") self.option3.pack(anchor="w") # Create a button to show the selected option self.button = tk.Button(master, text="Show Option", command=self.show_option) self.button.pack() # Create label to display the selected option self.label = tk.Label(master, text="") self.label.pack() def show_option(self): # Update the label with the selected option self.label.config(text="Selected Language: " + self.selected_option.get()) root = tk.Tk() app = RadioExample(root) root.mainloop() |
In the above example we have created a frame to hold the Radiobuttons and create three Radiobuttons with different text and values. after that we have created a button to show the selected option and a label to display it. when the button is clicked, show_option method is called which updates the label with the selected option.
Run the code and this is the result
Python TKinter Menu
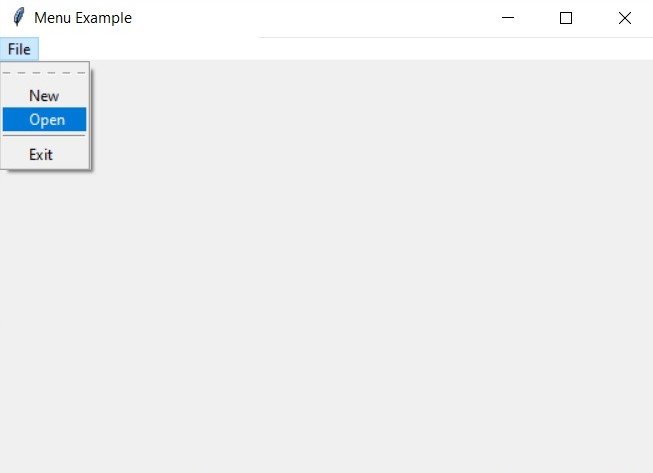
In Python TKinter a menu is a graphical user interface (GUI) element that displays a list of options or commands. it provides an easy way to organize and access a set of related options or commands in a program. Python TKinter menu can be created using the Menu widget. it is typically used to create a traditional menu bar with dropdown menus that contain different commands or options.
|
1 2 3 4 5 6 7 8 9 10 11 12 13 14 15 16 17 18 19 20 21 22 23 24 |
import tkinter as tk class MenuExample: def __init__(self, master): self.master = master master.title("Menu Example") # create the menu bar menu_bar = tk.Menu(master) master.config(menu=menu_bar) # create the file menu file_menu = tk.Menu(menu_bar) file_menu.add_command(label="New") file_menu.add_command(label="Open") file_menu.add_separator() file_menu.add_command(label="Exit", command=master.quit) # add the file menu to the menu bar menu_bar.add_cascade(label="File", menu=file_menu) root = tk.Tk() menu_example = MenuExample(root) root.mainloop() |
Run the code and this will be the result
Python TKinter Message
In Python TKinter a Message widget is used to display messages that are too long to be displayed in a Label widget. Message widget can display multiple lines of text and the width of the widget can be set to accommodate the text. Message widget has several options such as the text to be displayed, width of the widget, font used to display the text and the color of the widget.
|
1 2 3 4 5 6 7 8 9 10 11 12 13 14 15 16 17 18 19 20 |
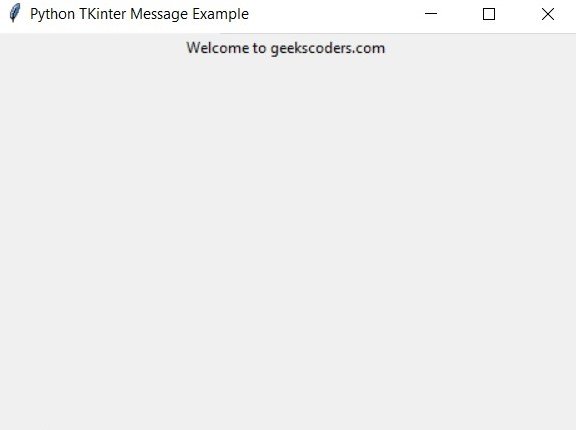
import tkinter as tk class MessageExample: def __init__(self, master): self.master = master master.title("Python TKinter Message Example") # create a Message widget with some text self.message = tk.Message(master, text="Welcome to geekscoders.com") # set the width of the widget self.message.config(width=200) # use the pack geometry manager to # add the widget to the window self.message.pack() root = tk.Tk() app = MessageExample(root) root.mainloop() |
In the above example we have created new App class that contains a Message widget. Message widget is initialized with some text and its width is set to 200 pixels using the config method. and lastly the widget is added to the window using the pack geometry manager.
Run the code and this will be the result
Learn More on Python GUI
So we can say that TKinter is powerful Python GUI library that allows developers to create attractive and functional GUI applications. this library provides different widgets, layout managers and event handling mechanisms that can be used to build robust applications. In this tutorial we have covered the basics of TKinter, including creating windows, labels, buttons, entry widgets, frames, checkbuttons, radiobuttons, menus and messages.
