In this Django REST Framework lesson we are going to learn about Django REST Framework Authentication, basically we will learn about Token Authentication.
Authentications
Authentication is the mechanism of associating an incoming request with a set of identifying credentials, such as the user the request came from, or the token that it was signed with. The permission and throttling policies can then use those credentials to determine if the request should be permitted. REST framework provides a number of authentication schemes out of the box, and also allows you to implement custom schemes. Authentication is always run at the very start of the view, before the permission and throttling checks occur, and before any other code is allowed to proceed. there are different authentications that we can use for example, Basic Authentication, Token Authentication and Session Authentication.
- Basic Authentication: This authentication scheme uses HTTP Basic Authentication, signed against a user’s username and password. Basic authentication is generally only appropriate for testing.
- Token Authentication: This authentication scheme uses a simple token-based HTTP Authentication scheme. Token authentication is appropriate for client-server setups, such as native desktop and mobile clients.
- Session Authentication: This authentication scheme uses Django’s default session backend for authentication. Session authentication is appropriate for AJAX clients that are running in the same session context as your website.
There are two ways that you can add authentication mechanism for your api, the first way is globally and you can add the required information in your settings.py file, in this way your all views will be restricted.
|
1 2 3 4 5 |
REST_FRAMEWORK = { 'DEFAULT_PERMISSION_CLASSES': [ 'rest_framework.permissions.IsAuthenticated', ] } |
The second way is that you can add the required authentication in your specific views, for example if you have two views and you want the first view should be accessible just for logged in users, than you can add the required authentication information in your that view.
As we have already said that we are going to use Token Authentication, so for this open your settings.py file and add this in your INSTALLED_APPS.
|
1 2 3 4 |
INSTALLED_APPS = [ ... 'rest_framework.authtoken' ] |
After that you need to migrate your project, because we need a table for storing of the tokens.
|
1 |
python manage.py migrate |
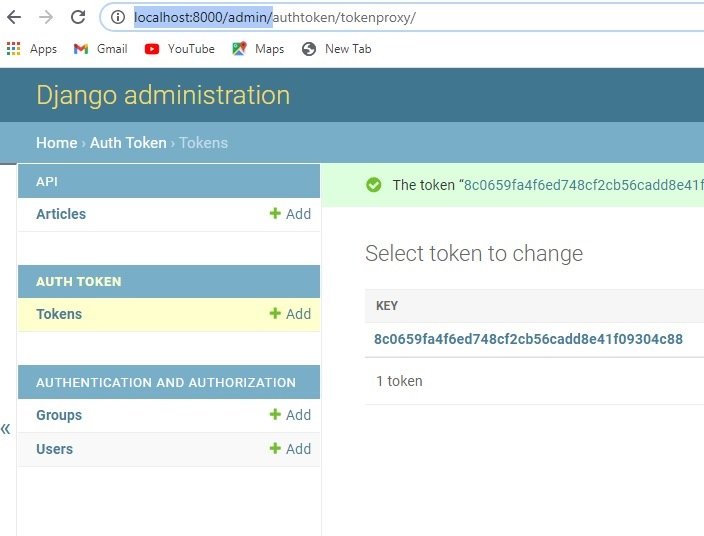
Now go to http://localhost:8000/admin/, you can see that we have a new table at name of Tokens, also you need to create a token for your registered user from admin panel.

Now you need to open your main project urls.py file and add the newly line of code.
|
1 2 3 4 5 6 7 8 9 10 |
from django.contrib import admin from django.urls import path, include from rest_framework.authtoken.views import obtain_auth_token urlpatterns = [ path('admin/', admin.site.urls), path('', include('api.urls')), path('auth/', obtain_auth_token) #newly added code ] |
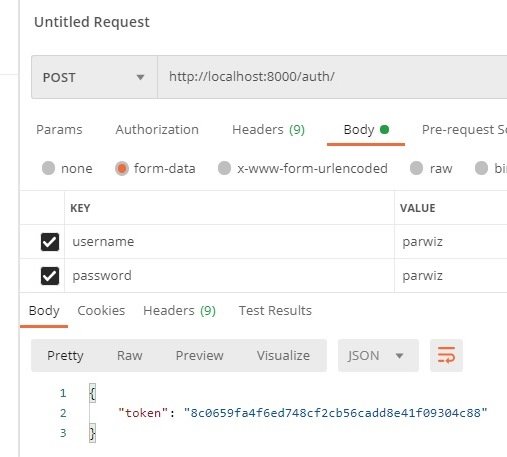
Open your Postman and after that add http://localhost:8000/auth/ url, give your password and username you will see the token, this is the token that we have already created in our django admin panel and this token is associated with the specific user.

Now we want to restrict our view, we already have an Article view, now we want to restrict this, we want the user that has token can access this view, as we have said there are two ways that you can add authentication, the first way is in your settings.py file, you can add this code, and now you can not access your views without the token.
|
1 2 3 4 5 |
REST_FRAMEWORK = { 'DEFAULT_PERMISSION_CLASSES': [ 'rest_framework.permissions.IsAuthenticated', ] } |
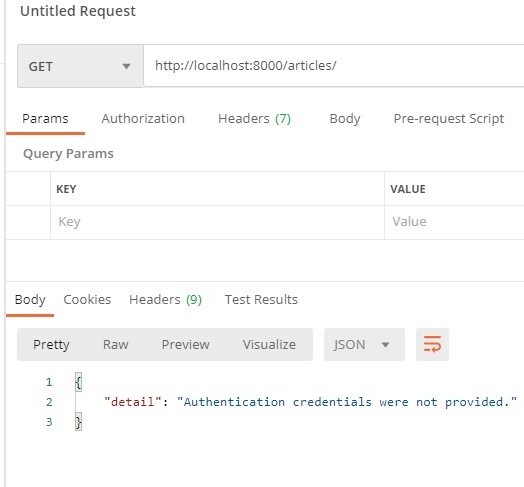
If you add the http://localhost:8000/articles/ url in your Postman, you will receive like this error.

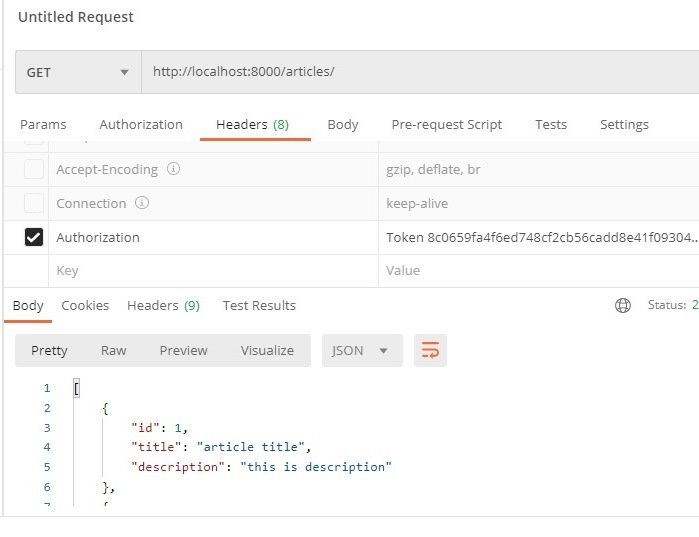
If you add the registered token, you will receive the articles, before that open your views.py file and you need to specify the authentication type for your view.
|
1 2 3 4 5 6 7 8 9 10 11 |
from .models import Article from .serializers import ArticleSerializer from rest_framework import viewsets from rest_framework.authentication import TokenAuthentication class ArticleViewSet(viewsets.ModelViewSet): serializer_class = ArticleSerializer queryset = Article.objects.all() authentication_classes = (TokenAuthentication,) |
Now you can see after adding the token we can access the view.

Also you can add the authentication in your specific view like this.
|
1 2 3 4 5 6 7 8 9 10 11 12 13 |
from .models import Article from .serializers import ArticleSerializer from rest_framework import viewsets from rest_framework.authentication import TokenAuthentication from rest_framework.permissions import IsAuthenticated class ArticleViewSet(viewsets.ModelViewSet): serializer_class = ArticleSerializer queryset = Article.objects.all() authentication_classes = (TokenAuthentication,) permission_classes = [IsAuthenticated] |