In this PyQt6 lesson we are going to learn about Creating Button in Qt Designer with PyQt6, we have already learned that how you can create buttons and labels in PyQt6 using coding, now we want to use Qt Designer to do the same functionality.
What is PyQt6 Qt Designer ?
PyQt6 Qt Designer is a visual UI design tool included with the PyQt6 library that allows developers to create and design graphical user interfaces (GUIs) for their PyQt6 applications. Qt Designer provides drag and drop interface for creating and editing GUIs, allowing developers to quickly prototype and design their UIs without having to write any code.
With PyQt6 Qt Designer, developers can create different types of of UI elements such as buttons, labels, text boxes, check boxes, radio buttons and many more. developers can also customize the appearance and behavior of these elements using Qt Designer’s property editor, which provides visual interface for setting properties such as font, color, alignment and size.
Once GUI has been designed in Qt Designer, it can be saved as a .ui file, which is an XML based file format that contains description of the UI elements and their properties. this .ui file can then be loaded into a PyQt6 application using the uic module, which converts the .ui file into Python code that can be used to create and display the UI.
Using PyQt6 Qt Designer can significantly speed up the process of creating and designing GUIs for PyQt6 applications, allowing developers to focus on implementing the underlying functionality of their applications rather than spending time on the UI design.
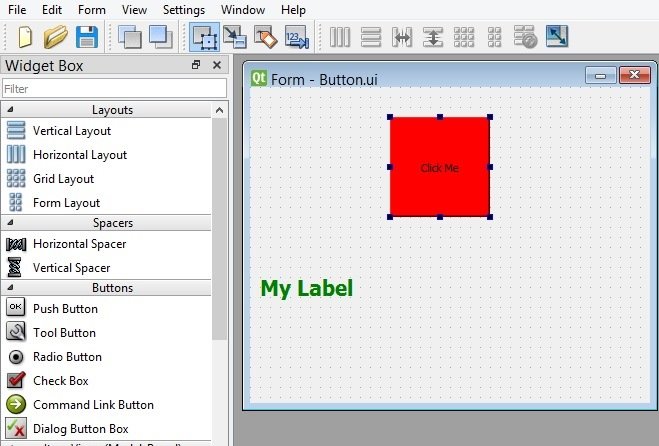
Open your Qt Designer using pyqt5designer command in your terminal, after that create a new Widget application window, you can drag and drop the QPushButton and QLabel from the Widget Box.
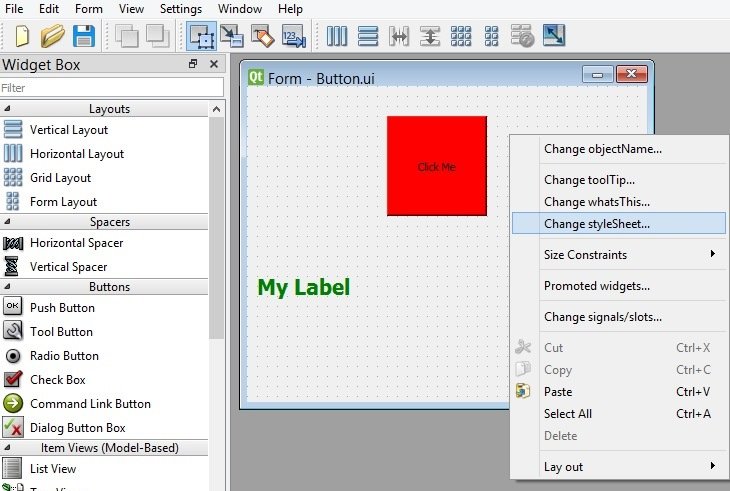
If you want to add some stylesheets for your widgets, than you need to right click on your window, after that choose Changestylesheet.
After completing the design, save the file and it will be .ui extension file, we need to convert this to py file, we want to use pyuic6 module for this, so run this command in your terminal.
|
1 |
pyuic6 -x Button.ui -o mybutton.py |
This is the converted file, but we have also added the signal and slot functionality.
|
1 2 3 4 5 6 7 8 9 10 11 12 13 14 15 16 17 18 19 20 21 22 23 24 25 26 27 28 29 30 31 32 33 34 35 36 37 38 39 40 41 42 43 44 45 46 47 48 49 50 51 52 53 54 55 56 |
from PyQt6 import QtCore, QtGui, QtWidgets class Ui_Form(object): def setupUi(self, Form): Form.setObjectName("Form") Form.resize(400, 316) Form.setStyleSheet("QPushButton {\n" "\n" "background-color:\"red\"\n" "\n" "}\n" "\n" "QLabel {\n" "\n" "color:\"green\"\n" "\n" "}") self.pushButton = QtWidgets.QPushButton(Form) self.pushButton.setGeometry(QtCore.QRect(140, 30, 100, 100)) self.pushButton.setObjectName("pushButton") #connected the button with method self.pushButton.clicked.connect(self.clicked_btn) self.label = QtWidgets.QLabel(Form) self.label.setGeometry(QtCore.QRect(10, 180, 341, 41)) font = QtGui.QFont() font.setPointSize(16) font.setBold(True) font.setWeight(75) self.label.setFont(font) self.label.setObjectName("label") self.retranslateUi(Form) QtCore.QMetaObject.connectSlotsByName(Form) def clicked_btn(self): self.label.setText("Check geekscoders.com website") self.label.setStyleSheet('background-color:red') def retranslateUi(self, Form): _translate = QtCore.QCoreApplication.translate Form.setWindowTitle(_translate("Form", "Form")) self.pushButton.setText(_translate("Form", "Click Me")) self.label.setText(_translate("Form", "My Label")) if __name__ == "__main__": import sys app = QtWidgets.QApplication(sys.argv) Form = QtWidgets.QWidget() ui = Ui_Form() ui.setupUi(Form) Form.show() sys.exit(app.exec()) |
This is our method for changing the text and background color of the label.
|
1 2 3 |
def clicked_btn(self): self.label.setText("Check geekscoders.com website") self.label.setStyleSheet('background-color:red') |
In here we have connected our clicked signal of the button with the method that we have already created.
|
1 |
self.pushButton.clicked.connect(self.clicked_btn) |
Run the code and this is the result.

