In this PyQt6 tutorial we are going to learn about PyQt6 Introduction & Installation, first we are going to talk about PyQt6 and after that we are going to learn about the installation process of PyQt6, at the end we create our first GUI window.
What is PyQt (PyQt6) ?
PyQt is a set of Python bindings for The Qt Company’s Qt application framework and runs on all platforms supported by Qt including Windows, macOS, Linux, iOS and Android. PyQt6 supports Qt v6, PyQt5 supports Qt v5 and PyQt4 supports Qt v4. The bindings are implemented as a set of Python modules and contain over 1,000 classes, before this there were PyQt4 and PytQt5 now we have the latest version and that is PyQt6. PyQt brings together the Qt C++ cross-platform application framework and the cross-platform interpreted language Python. Qt is more than a GUI toolkit. It includes abstractions of network sockets, threads, Unicode, regular expressions, SQL databases, SVG, OpenGL, XML, a fully functional web browser, a help system, a multimedia framework, as well as a rich collection of GUI widgets. Qt also includes Qt Designer, a graphical user interface designer. PyQt is able to generate Python code from Qt Designer. It is also possible to add new GUI controls written in Python to Qt Designer. Python is a simple but powerful object-orientated language. Its simplicity makes it easy to learn, but its power means that large and complex applications can be created. Its interpreted nature means that Python programmers are very productive because there is no edit/compile/link/run development cycle.
Installation
You can easily use pip for the installation of PyQt6.
|
1 |
pip install PyQt6 |
Now let’s create our first window, this is our code for our GUI window.
|
1 2 3 4 5 6 7 8 |
from PyQt6.QtWidgets import QApplication, QWidget import sys app = QApplication(sys.argv) window = QWidget() window.show() sys.exit(app.exec()) |
Every PyQt6 application should create the object of the QApplication class, you can give sys.argv as parameter of you can leave it blank, if you want to use command prompt to run the application than you need to give sys.argv, sys. argv is a list in Python, which contains the command-line arguments passed to the script.
In here we need to create the object of QWidget class, there are three types of classes that you can create in PyQt, we have QWidget, QDialog and QMainWindow.
|
1 |
window = QWidget() |
- QWidget: The QWidget class is the base class of all user interface
objects, The widget is the important point of the user interface:
it receives mouse, keyboard and other events from the window
system, and paints a representation of itself on the screen. - QDialog: The QDialog class is the base class of dialog window
and A dialog window is a top-level window mostly used for
short-term tasks and brief communications with the user.
QDialogs may be modal or modeless. - QMainWindow: The QMainWindow class provides a main application window
A main window provides a framework for building an
application’s user interface. PyQt5 has QMainWindow and its
related classes for main window management. QMainWindow has
its own layout to which you can add QToolBars, QDockWidgets,
a QMenuBar, and a QStatusBar.
After creating of the window you need to show your window.
|
1 |
window.show() |
Now this is the big difference between PyQt5 and PyQt6, in PyQt5 you need to use app.exec_(), but in PyQt6 we can not use this, we need to use app.exec().
|
1 |
sys.exit(app.exec()) |
Run the complete code and this is the result.

Now we are going to add more functionality to our code and we want to use Object Oriented terminology for creating of our Window in PyQt6.
|
1 2 3 4 5 6 7 8 9 10 11 12 13 14 15 16 17 18 19 20 21 22 23 24 25 |
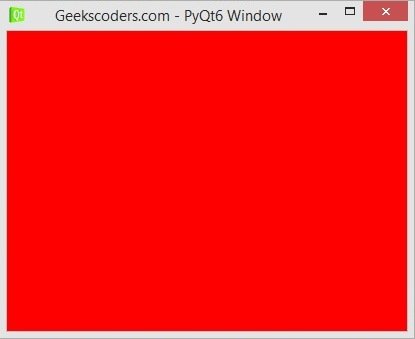
from PyQt6.QtWidgets import QApplication, QWidget from PyQt6.QtGui import QIcon import sys class Window(QWidget): def __init__(self): super().__init__() self.setWindowTitle("Geekscoders.com - PyQt6 Window") self.setWindowIcon(QIcon("qt.png")) self.setGeometry(500,200, 400,300) #self.setFixedHeight(200) #self.setFixedWidth(200) #self.setStyleSheet('background-color:red') stylesheet = ( "background-color : red;" ) self.setStyleSheet(stylesheet) app = QApplication(sys.argv) window = Window() window.show() sys.exit(app.exec()) |
We have created a main window class that extends from QWidget, and we have added the title, window icon, geometry, fixed width and height, also color for the window background.
“__init__” is a reserved method in python classes. It is called as a constructor in object oriented programming. This method is called when an object is created from a class and it allows the class to initialize the attributes of the class.
The super() function is used to give access to methods and properties of a parent class. And the super() function makes class inheritance more manageable.
The word ‘self’ is used to represent the instance of the class. By using the “self” keyword we can access the attributes and methods of the class in python.
Run the complete code and this is the result.
Creating Window With Qt Designer
Now we want to create our window using Qt Designer, Qt Designer is the Qt tool for designing and building graphical user interfaces (GUIs) with Qt Widgets. You can compose and customize your windows or dialogs in a what-you-see-is-what-you-get (WYSIWYG) manner, and test them using different styles and resolutions.
First of all you need to install Qt Designer, because by default we don’t have Qt Designer, you need to install pyqt5 tools and you can easily use pip for the installation, even tough we are using PyQt6, but you can use pyqt5 tools with PyQt6.
|
1 |
pip install pyqt5-tools |
After installation, you need to write pyqt5designer or pyqt5designer.exe in your terminal and you will see your Qt Designer.
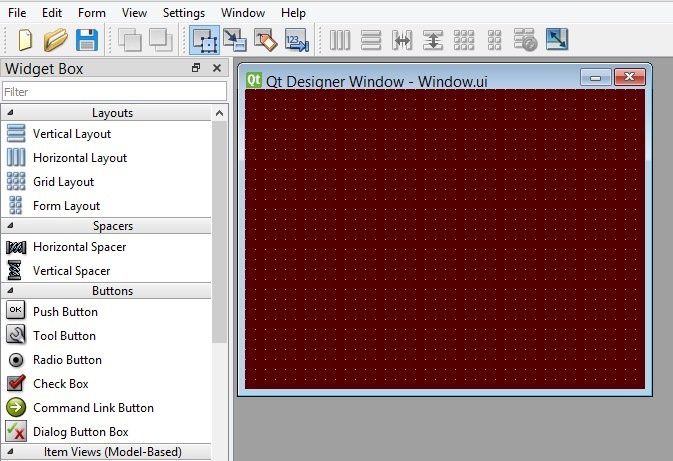
You can right click on the window, after that click on Changestylesheet for changing the background color.
|
1 2 3 4 5 |
QWidget { background-color:"#550000" } |
Now you need to save your file, you will see that you have .ui extension, now there are two ways that you can use from this design, the first way is loading your .ui file, for this we are going to use uic module.
Loading Qt Designer UI File
Create a Python file, i have called it WindowLoad.py and you need to add this code, make sure that you have already saved the ui file in the same directory of the Python file.
|
1 2 3 4 5 6 7 8 9 10 11 12 13 14 |
from PyQt6.QtWidgets import QApplication, QWidget from PyQt6 import uic import sys class UI(QWidget): def __init__(self): super().__init__() #this is used for loading ui file uic.loadUi("Window.ui", self) app = QApplication([]) window = UI() window.show() sys.exit(app.exec()) |
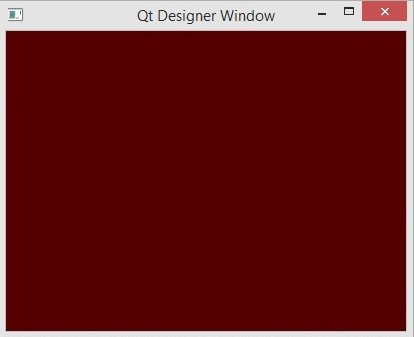
You can see that we have used uic.loadUi(“Window.ui”, self), you need to give the ui file name.
Run the code and this is the result.
Converting UI File to Py File.
In this way we are using pyuic6 module, it is located in the script folder of your python installation, after that run this code in your terminal.
|
1 |
pyuic6 -x Window.ui -o mywindow.py |
And you will see the converted file, this is my converted file.
|
1 2 3 4 5 6 7 8 9 10 11 12 13 14 15 16 17 18 19 20 21 22 23 24 25 26 27 28 29 |
from PyQt6 import QtCore, QtGui, QtWidgets class Ui_Form(object): def setupUi(self, Form): Form.setObjectName("Form") Form.resize(400, 300) Form.setStyleSheet("QWidget {\n" "\n" "background-color:\"#550000\"\n" "\n" "}") self.retranslateUi(Form) QtCore.QMetaObject.connectSlotsByName(Form) def retranslateUi(self, Form): _translate = QtCore.QCoreApplication.translate Form.setWindowTitle(_translate("Form", "Qt Designer Window")) if __name__ == "__main__": import sys app = QtWidgets.QApplication(sys.argv) Form = QtWidgets.QWidget() ui = Ui_Form() ui.setupUi(Form) Form.show() sys.exit(app.exec()) |
