In this Python Pyglet article we are going to learn Working with Pyglet Library in Python, we will learn how you can install pyglet library, and how you can use pyglet in python.
What is Pyglet ?
pyglet is a cross-platform windowing and multimedia library for Python, intended for developing games and other visually rich applications. It supports windowing, user interface event handling, Joysticks, OpenGL graphics, loading images and videos, and playing sounds and music. pyglet works on Windows, OS X and Linux.
Learn More on Python
- Python Top 5 Game Libraries
- Python GUI Development Libraries
- Web Development Libraries in Python
- How to Download Youtube Videos in Python
Installation
First of all we need to install this library, you can use pip for the installation.
|
1 |
pip install pyglet |
Creating First Window in Pyglet
Now let’s create our first window in python pyglet.
|
1 2 3 4 5 6 7 8 9 10 11 12 13 14 15 16 17 18 19 |
import pyglet window = pyglet.window.Window() label = pyglet.text.Label("Welcome to GeeksCoders.com", font_name='Times New Roman', font_size=35, x=window.width /2, y = window.height/2, anchor_x='center', anchor_y='center') @window.event def on_draw(): window.clear() label.draw() pyglet.app.run() |
You can create the object of the pyglet window using pyglet.window.Window().
|
1 |
window = pyglet.window.Window() |
This is used for creating of the label in pyglet, we want to create a simple label in our window, and we have added some information for our label like the text of label, font type, font size, font name and the x and y position of label,
|
1 2 3 4 5 |
label = pyglet.text.Label("Welcome to GeeksCoders.com", font_name='Times New Roman', font_size=35, x=window.width /2, y = window.height/2, anchor_x='center', anchor_y='center') |
also we need to override on_draw() method , in that method we clear the window and we draw the label on window. at the end we run our pyglet application by using pyglet.app.run()
|
1 2 3 |
def on_draw(): window.clear() label.draw() |
Run the code and this is the result.

Adding Image to Pyglet Window
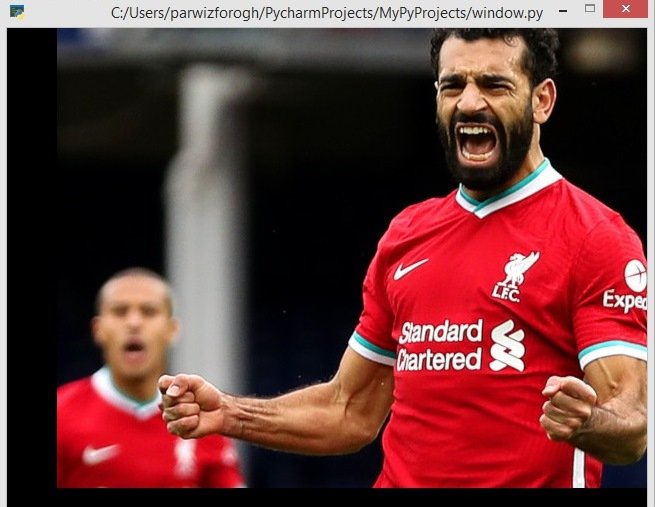
OK now let’s learn that how you can add image in your pyglet window, basically we want to add an image to our window.
So this is the complete code for adding image in pyglet application.
|
1 2 3 4 5 6 7 8 9 10 11 12 13 |
import pyglet window = pyglet.window.Window() image = pyglet.resource.image('img.jpeg') @window.event def on_draw(): window.clear() image.blit(50,20) pyglet.app.run() |
You can use pyglet.resource.image() function for adding images, make sure that you have already added an image in your working directory.
|
1 |
image = pyglet.resource.image('img.jpeg') |
After that we create our def on_draw() method, An on_draw() event is dispatched to the window to give it a chance to redraw its contents. pyglet provides several ways to attach event handlers to objects, a simple way is to use a decorator.
And finally we we call our loop, This will enter pyglet’s default event loop, and let pyglet respond to application events such as the mouse and keyboard. Your event handlers will now be called as required, and the run() method will return only when all application windows have been closed.
Run the code and this is the result.

Adding Icon & Title to Pyglet Window
Now let’s add icon and title to our pyglet application, right now we don’t have icon and title for our window. to add icon in the window you can use pyglet.image.load(), make sure that you have already added an icon in your working directory.
|
1 2 |
icon = pyglet.image.load('icon.png') window.set_icon(icon) |
This code is used for adding a size to our window.
|
1 |
window.set_minimum_size(400,300) |
This line of code is for creating of our Window object and we pass some arguments to this like width and height, resizable that takes Boolean value and also the style of the window, there are different styles that you can use.
|
1 |
window = pyglet.window.Window(1280, 720, "Geekcoders.com", resizable=True, style=window.Window.WINDOW_STYLE_DIALOG) |
Different window styles in Python Pyglet
| WINDOW_STYLE_BORDERLESS | borderless |
| WINDOW_STYLE_DEFAULT | None |
| WINDOW_STYLE_DIALOG | dialog |
| WINDOW_STYLE_TOOL | tool |
So now this is the complete code.
|
1 2 3 4 5 6 7 8 9 10 11 12 13 14 15 16 17 |
import pyglet from pyglet import window window = pyglet.window.Window(1280, 720, "Geekcoders.com", resizable=True, style=window.Window.WINDOW_STYLE_DIALOG) window.set_minimum_size(400,300) icon = pyglet.image.load('icon.ico') window.set_icon(icon) @window.event def on_draw(): window.clear() pyglet.app.run() |
Run the code and this time we have a window with title and icon.

Loading GIF Image with Pyglet
OK now let’s load a gif image using pyglet library, basically we are going to talk about pyglet animation, so according to Pyglet Documentation, The Animation class manages a list of Animation Frame objects, each of which references an image and a duration (in seconds). The storage of the images is up to the application developer, they can each be discrete, or packed into a texture atlas, or any other technique. An animation can be loaded directly from a GIF 89a image file with load_animation() (supported on Linux, Mac OS X and Windows) or constructed manually from a list of images or an image sequence using the class methods (in which case the timing information will also need to be provided). The add_to_texture_bin() method provides a convenient way to pack the image frames into a texture bin for efficient access. Individual frames can be accessed by the application for use with any kind of rendering, or the entire animation can be used directly with a Sprite.
|
1 2 |
animation = pyglet.image.load_animation('mypic.gif') animSprite = pyglet.sprite.Sprite(animation) |
So now this is the complete code.
|
1 2 3 4 5 6 7 8 9 10 11 12 13 14 15 16 17 18 19 20 21 22 23 24 |
import pyglet animation = pyglet.image.load_animation('mypic.gif') animSprite = pyglet.sprite.Sprite(animation) w = animSprite.width h = animSprite.height window = pyglet.window.Window(width=w, height=h) r,g,b,alpha = 0.5,0.5,0.8,0.5 pyglet.gl.glClearColor(r,g,b,alpha) @window.event def on_draw(): window.clear() animSprite.draw() pyglet.app.run() |
How to Play Mp3 Songs in Pyglet Library
OK now let’s learn how you can play Mp3 songs using pyglet library, pyglet can play many audio and video formats. Audio is played back with either OpenAL, DirectSound or Pulseaudio, permitting hardware-accelerated mixing and surround-sound 3D positioning. Video is played into OpenGL textures, and so can be easily manipulated in real-time by applications and incorporated into 3D environments. Decoding of compressed audio and video is provided by FFmpeg v4.X, an optional component available for Linux, Windows and Mac OS X. FFmpeg needs to be installed separately.
This is the complete code for playing mp3, make sure that you have already added an mp3 song in your working directory.
|
1 2 3 4 5 6 7 |
import pyglet music = pyglet.resource.media('guitar.mp3', streaming=False) music.play() pyglet.app.run() |
How to Play Mp4 Videos in Pyglet Library
Also you can play mp4 videos with pyglet, so this is the code for playing videos, make sure that you have already adedd an mp4 video in your working directory.
|
1 2 3 4 5 6 7 8 9 10 11 12 13 14 15 16 17 18 19 20 |
import pyglet vidPath = 'football.mp4' window= pyglet.window.Window() player = pyglet.media.Player() source = pyglet.media.StreamingSource() MediaLoad = pyglet.media.load(vidPath) player.queue(MediaLoad) player.play() @window.event def on_draw(): if player.source and player.source.video_format: player.get_texture().blit(50,50) pyglet.app.run() |
You can implement many functions common to a media player using the Player class. Use of this class is also necessary for video playback. There are no parameters to its construction, also a player will play any source that is “queued” on it. Any number of sources can be queued on a single player, but once queued, a source can never be dequeued (until it is removed automatically once complete). The main use of this queuing mechanism is to facilitate “gapless” transitions between playback of media files.
Handling Keyboard Events in Pyglet
pyglet has support for low-level keyboard input suitable for games as well as locale and device independent Unicode text entry. Keyboard input requires a window which has focus. The operating system usually decides which application window has keyboard focus. Typically this window appears above all others and may be decorated differently, though this is platform-specific (for example, Unix window managers sometimes couple keyboard focus with the mouse pointer). You can request keyboard focus for a window with the activate() method, but you should not rely on this – it may simply provide a visual cue to the user indicating that the window requires user input, without actually getting focus.
This is the complete code.
|
1 2 3 4 5 6 7 8 9 10 11 12 13 14 15 16 17 18 19 20 21 22 23 24 25 26 27 |
import pyglet from pyglet.window import key window = pyglet.window.Window() @window.event def on_key_press(symbol, modifiers): if symbol == key.A: print("A Key Was Pressed") elif symbol == key.B: print("B Key Was Pressed") elif symbol == key.ENTER: print("Enter Key Was Pressed") @window.event def on_draw(): window.clear() pyglet.app.run() |
Handling Mouse Events in Pyglet
All pyglet windows can receive inputs from a 3 button mouse with a 2 dimensional scroll wheel. The mouse pointer is typically drawn by the operating system, but you can override this and request either a different cursor shape or provide your own image or animation.
So now this is the complete code.
|
1 2 3 4 5 6 7 8 9 10 11 12 13 14 15 16 17 18 19 20 21 22 23 24 25 26 27 |
import pyglet from pyglet.window import mouse window = pyglet.window.Window() window.push_handlers(pyglet.window.event.WindowEventLogger()) @window.event def on_mouse_press(x,y, button, modifier): if button == mouse.LEFT: print("The Left Mouse Was Pressed") elif button == mouse.RIGHT: print("Right Mouse Was Pressed") @window.event def on_draw(): window.clear() pyglet.app.run() |

