In this article we want to talk about Building Interactive Applications with Tkinter Bindings, so Building interactive applications is an essential aspect of software development. one way to achieve this is by using Tkinter bindings in Python. Tkinter is standard GUI (Graphical User Interface) toolkit that is widely used in Python applications. It provides simple and intuitive way to build interactive graphical applications with Python.
Tkinter bindings allow us to bind functions or methods to different events that occur on the widgets in GUI. These events include button clicks, mouse movements, key presses and many more. by binding functions to these events, we can make our application respond to user actions in real time.
In this article, we will explore how to build interactive applications with Tkinter bindings.
Creating Simple GUI Application
Before we dive into the details of Tkinter bindings, let’s create simple GUI application using Tkinter. following code creates a window with label and button.
|
1 2 3 4 5 6 7 8 9 10 11 12 13 14 15 16 17 18 |
import tkinter as tk # Create the main window root = tk.Tk() # Set the title root.title("My Application") # Create a label label = tk.Label(root, text="GeeksCoders.com") label.pack() # Create a button button = tk.Button(root, text="Click Me!") button.pack() # Run the main loop root.mainloop() |
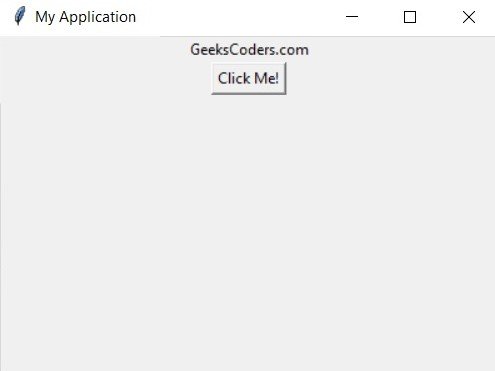
When you run this code, it creates window with label and button. label displays the text “GeeksCoders.com” and the button has label “Click Me!”.
Run the complete code this will be the result.

Adding Event Bindings
Now let’s add some event bindings to our GUI application. In the following code we bind function to the button click event. when the user clicks the button, the on_button_click function will be called.
|
1 2 3 4 5 6 7 8 9 10 11 12 13 14 15 16 17 18 19 20 21 22 23 |
import tkinter as tk # Define the function to be called on button click def on_button_click(): print("Button clicked!") # Create the main window root = tk.Tk() # Set the title root.title("My Application") # Create a label label = tk.Label(root, text="GeeksCoders.com") label.pack() # Create a button and bind it to the on_button_click function button = tk.Button(root, text="Click Me!") button.pack() button.bind("<Button-1>", lambda event: on_button_click()) # Run the main loop root.mainloop() |
In this code we have defined on_button_click function to print message to the console. after that we have created button and bind it to on_button_click function using bind method. “<Button-1>” argument specifies that we want to bind function to left mouse button click event.
Using lambda function, we can pass event object to the on_button_click function. event object contains information about the event, such as the widget that triggered the event.
You can bind functions to other events, such as the key press event, the mouse hover event, and many more. following code shows an example of how to bind a function to the key press event.
|
1 2 3 4 5 6 7 8 9 10 11 12 13 14 15 16 17 18 19 20 21 |
import tkinter as tk # Define the function to be called on key press def on_key_press(event): print("Key pressed: " + event.char) # Create the main window root = tk.Tk() # Set the title root.title("My Application") # Create a label label = tk.Label(root, text="Press a key!") label.pack() # Bind the key press event to the on_key_press function root.bind("<Key>", on_key_press) # Run the main loop root.mainloop() |
In this code we have defined on_key_press function to print the character of the key that was pressed. after that we have bind the on_key_press function.
Learn More on TKinter
- How to Create Conutdown Timer with Python & TKinter
- Create GUI Applications with Python & TKinter
- Python TKinter Layout Management
- How to Create Label in TKinter
- How to Create Buttin in Python TKinter
- Build Music Player in Python TKinter
- Python GUI Programming with TKinter
- TKinter VS PyQt, Which one is Good
- Creating Custom Widgets in TKinter
