In this lesson we want to learn about Python PySide6 QSpinBox, QSpinBox widget is GUI component that can be used in different applications. it can be used to select specific value within a range, to increase or decrease a numerical value, or to specify specific value in user-friendly way.
Creating QSpinBox in PySide6 is easy. you can create QSpinBox instance using the following code:
|
1 2 3 4 5 6 7 8 9 10 11 12 13 |
from PySide6.QtWidgets import QApplication, QMainWindow, QSpinBox app = QApplication() window = QMainWindow() spinbox = QSpinBox(parent=window) spinbox.move(50, 50) spinbox.setMinimum(0) spinbox.setMaximum(100) spinbox.setValue(50) window.show() app.exec() |
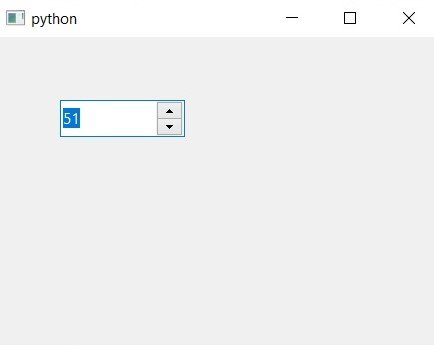
In this example we have created QSpinBox instance and set the parent of the QSpinBox to be main window. after that we move the spin box to position (50, 50) on the screen. We also set the minimum value to 0, the maximum value to 100, and default value to 50 using the setMinimum, setMaximum, and setValue methods.
Run the complete code and this will be the result.

QSpinBox widget emits a signal whenever its value changes, that can be used to trigger an action in the application. for connecting a slot to the signal, you can use the following code:
|
1 2 3 4 |
def spinbox_changed(value): print(f"Spinbox value changed to {value}") spinbox.valueChanged.connect(spinbox_changed) |
In this example, we have defined new function at name of spinbox_changed that takes a single argument value. after that we print a message to the console indicating that the spin box value has changed.
after that we connect valueChanged signal of QSpinBox to the spinbox_changed function using the connect method. this will ensure that the spinbox_changed function is called every time the value of the QSpinBox changes.
QSpinBox widget also provides several customization options, such as setting the step size, specifying a prefix or suffix, and controlling the number of digits displayed. these options can be set using the following methods:
|
1 2 3 4 |
spinbox.setSingleStep(5) spinbox.setPrefix("$") spinbox.setSuffix(".00") spinbox.setDecimals(2) |
In this example, we set the step size to 5, the prefix to “$”, the suffix to “.00”, and the number of decimals to 2.
This is the complete code for QSpinBox with value changed signal functionality.
|
1 2 3 4 5 6 7 8 9 10 11 12 13 14 15 16 17 18 19 20 21 22 23 24 25 26 27 28 |
from PySide6.QtWidgets import QApplication, QMainWindow, QSpinBox, QLabel class MainWindow(QMainWindow): def __init__(self): super().__init__() self.setWindowTitle("QSpinBox Example") self.spinbox = QSpinBox(self) self.spinbox.move(50, 50) self.spinbox.setMinimum(0) self.spinbox.setMaximum(100) self.spinbox.valueChanged.connect(self.spinbox_changed) self.label = QLabel(self) self.label.move(50, 100) def spinbox_changed(self, value): self.label.setText(f"Spinbox value: {value}") self.label.adjustSize() if __name__ == "__main__": app = QApplication() window = MainWindow() window.show() app.exec() |
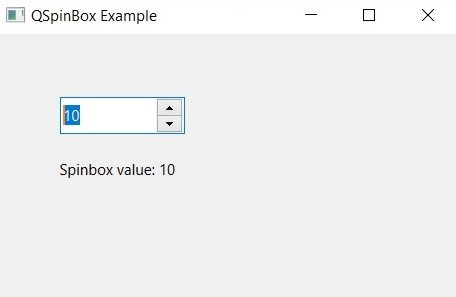
In this example, we have defined MainWindow class that extends from QMainWindow. after that we override the __init__ method to set the window title and create a new QSpinBox instance with the range 0-100. we set the parent of the QSpinBox to be the main window and move it to position (50, 50) on the screen. We also connect the valueChanged signal of the QSpinBox to the spinbox_changed method of the MainWindow class.
We have defined new method spinbox_changed that takes a single argument value. this method sets the text of the QLabel widget to display the current value of the QSpinBox. we also call the adjustSize method to ensure that the label is resized to fit the new text.
We also create a new QLabel instance and set its parent to be the main window. We move the label to position (50, 100) on the screen.
In the main block, we create a new QApplication instance and a new MainWindow instance. We show the main window and start the application event loop.
Run the complete code and this will be the result.
