In this Python SQLite tutorial we are going to learn Working with SQLite Database in Python, we are going to learn how you can insert, select, update and delete data in Python using SQLite Database.
What is SQLite ?
SQLite is an embedded relational Database engine. the documentation calls it a self-contained, serverless, zero configuration and transactional SQL database engine. It is very popular and there are hundreds of millions copies worldwide in use today. Several programming languages have built-in support for SQLite including Python and PHP. In Python Sqlite3 is a built in and you don’t need to Install that.
OK now let’s start our coding, first of all we are going to create a connection to the Sqlite database using Python.
SQLite Database Connection
We are going to Create SQLite Connection.
|
1 2 3 4 5 6 7 8 9 10 11 12 13 14 |
import sqlite3 as lit def main(): try: db = lit.connect('geekscoders.db') print("Database created", db) except: print("failed to create database") if __name__ == "__main__": main() |
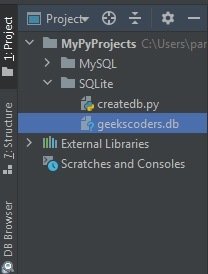
in the above code first we have imported our sqlite3, you don’t need to install this library, because it is built in with Python. for connecting our python code to sqlite database we can use sqlite3.connection() function. after runing above code you will have a database in your working directory at name of geekscoders.db.
Run the code and check your working directory, you will have the geekscoders.db database.
How to Create Table in Python SQLite
OK now we are going to create table for the database, right now i don’t have any table in the database, you can use this code for creating table.
|
1 2 3 4 5 6 7 8 9 10 11 12 13 14 15 16 17 |
import sqlite3 as lit def main(): try: db = lit.connect('geekscoders.db') cur = db.cursor() tablequery = "CREATE TABLE users (id INT, name TEXT, email TEXT)" cur.execute(tablequery) print("Table Created Succesfully") except lit.Error as e: print("Unable To Create Table") if __name__ == "__main__": main() |
First we have connected our code to the database that we have already created, you can use sqlite3.connection() and give the name of the database that you want to connect.
|
1 |
db = lit.connect('geekscoders.db') |
After that create the object of cursor() with query, and than execute your query.
|
1 2 3 |
cur = db.cursor() tablequery = "CREATE TABLE users (id INT, name TEXT, email TEXT)" cur.execute(tablequery) |
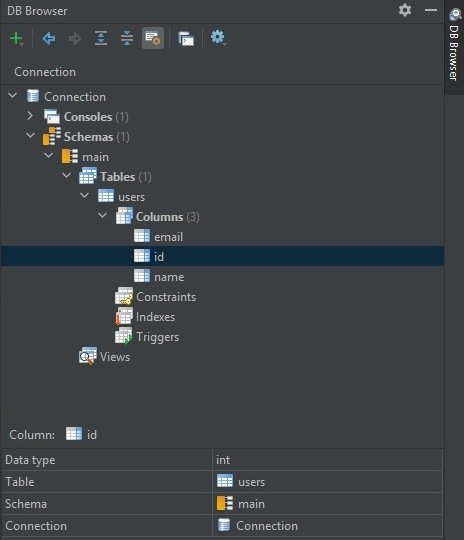
Run the code and you will see that the table is created in our database, now we are going to use a Pycharm Plugin, that is Database Navigator, first install that plugin because we want to check our SQLite database. and now you can see that we have our table with three fields in the database.
Inserting Data in SQLite Database
Now we want to insert some data in our database, you can use this code for inserting data to sqlite database.
|
1 2 3 4 5 6 7 8 9 10 11 12 13 14 15 16 |
import sqlite3 as lit myuser = ( (1, 'geekscoders', 'myemail@gmail.com'), (2, 'Parwiz', 'par@gmail.com'), (3, 'John', 'john@gmail.com'), (4, 'habib', 'habib@gmail.com'), ) db = lit.connect('geekscoders.db') with db: cur = db.cursor() cur.executemany('INSERT INTO users VALUES (?,?,?)', myuser) print("Data Inserted Successfully") |
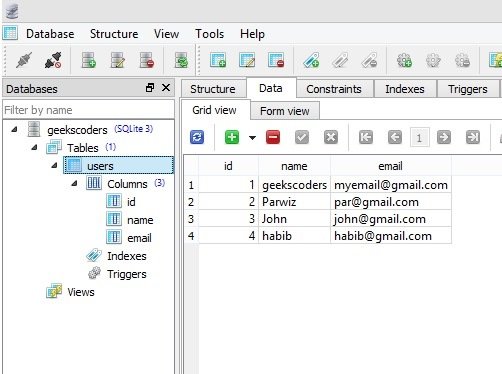
So for inserting the data first we have created our data, and after that we have connected our code to the database, than you need to create the object of cursor and at the end execute your query. because we are using multiple rows by this reason we use executemany(), of the executemany() method is a list of tuples, containing the data you want to insert: now we want to use SQLiteStudio software for checking our data in the database. first you need to download and install that, and after that add your database in to SQLiteStudio.
Python Selecting Data in SQLite Database
For selecting data first of all you need to create a cursor() object and after that you can select all the data from the Sqlite database in Python, this is the code for selecting the data.
|
1 2 3 4 5 6 7 8 9 10 11 12 13 |
import sqlite3 as lit db = lit.connect('geekscoders.db') with db: cur = db.cursor() selectquery = "SELECT * FROM users" cur.execute(selectquery) rows = cur.fetchall() for data in rows: print(data) |
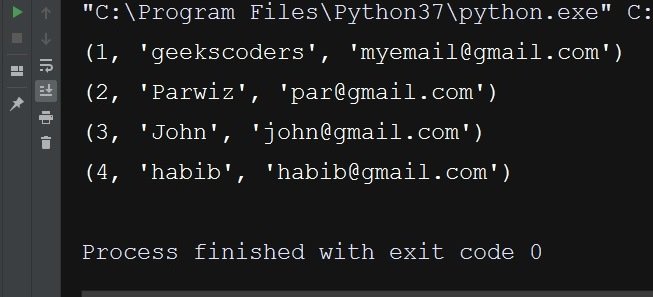
Run the code and this is the result.
- Python Socket Programming
- Working with Python Pyglet Library
- Python Speech Recognition For Beginners
- PyQtGraph Tutorial in Python
Python Updating Data in SQLite Database
Now let’s update our data, first you need to create object of the cursor(), after that you can use update query for updating the specific data.
|
1 2 3 4 5 6 7 8 9 10 11 12 13 14 |
import sqlite3 as lit db = lit.connect('geekscoders.db') with db: newname = "updatedname" user_id = 1 cur = db.cursor() cur.execute('UPDATE users SET name = ? WHERE id = ?', (newname, user_id)) db.commit() print("Data Updated Successfully") |
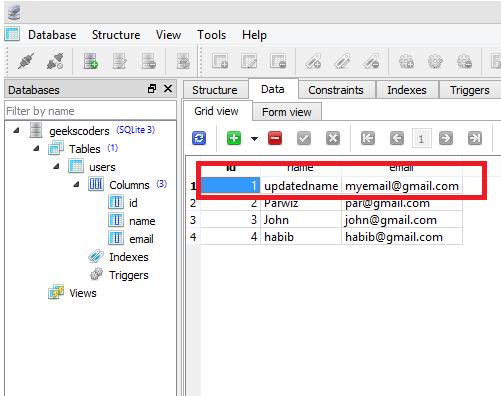
Now check your SQLiteStudio our first data is updated.
Python Deleting Data in SQLite Database
This is the code for deleting the data, and we are going to delete just one item from the table, you can just create your cursor object and after that you need to execute the query for deleting the data.
|
1 2 3 4 5 6 7 8 9 10 11 12 13 14 |
import sqlite3 as lit db = lit.connect('geekscoders.db') with db: newname = "updatedname" user_id = 1 cur = db.cursor() cur.execute('DELETE FROM users WHERE id = ? ', (user_id,) ) db.commit() print("Data Deleted Successfully") |
Run the code and check SQLiteStudio we don’t have the first row item.

