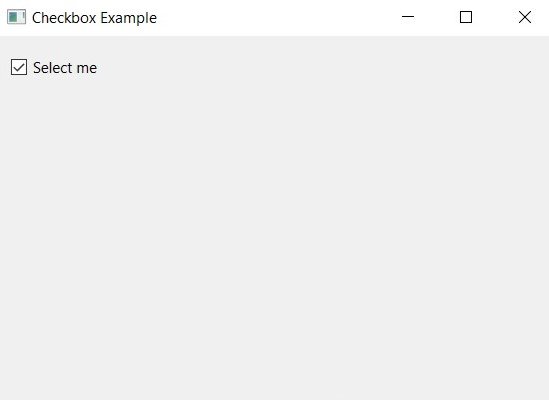
In this Python PySide6 article we are going to learn about How to Create CheckBox in Python PySide6, so Checkboxes are great way to allow users to select one or more options from list. they are commonly used in GUI applications and creating checkbox in Python using PySide6 is straightforward.
First of all we need to install Python PySide6, you can install that like this.
|
1 |
pip install pyside6 |
OK now let’s import our necessary libraries. we need QCheckBox class from PySide6.QtWidgets module to create checkbox. we will also use QApplication class to initialize our application window.
|
1 2 |
import sys from PySide6.QtWidgets import QApplication, QMainWindow, QCheckBox |
After that we are going to create a class called CheckBox that extends from QCheckBox. in this class we have defined properties and behavior of the checkbox.
|
1 2 3 4 5 6 7 8 |
class CheckBox(QCheckBox): def __init__(self, title, parent=None): super().__init__(title, parent) self.setChecked(True) self.stateChanged.connect(self.checkboxStateChanged) def checkboxStateChanged(self, state): print(f"Checkbox state changed to {state}") |
In the constructor of CheckBox class, we are going to call constructor of the QCheckBox class with title and parent arguments. also we set initial state of the checkbox to True using setChecked method.
after that we connect stateChanged signal to the checkboxStateChanged slot. stateChanged signal is emitted whenever checkbox state is changed. checkboxStateChanged slot is a method that we define later in the class, which will be called whenever the checkbox state changes. in this example, we simply print new state of the checkbox to the console.
Now it is time to create our main window and we are going to use QMainWindow class for this.
|
1 2 3 4 5 6 7 8 9 10 |
class MainWindow(QMainWindow): def __init__(self): super().__init__() self.setGeometry(100, 100, 250, 100) self.setWindowTitle("Checkbox Example") self.MyUI() def MyUI(self): checkbox = CheckBox("Select me", self) checkbox.move(10, 10) |
In the above code we have set the title and also the geometry of the window, the geometry is the x and y and width and height of the window.
In the MyUI() method, we have created an instance of the CheckBox class with title Select me and add it to the window using the move method.
and finally we are going yo create the main function that initializes the application and shows the main window.
|
1 2 3 4 5 |
if __name__ == "__main__": app = QApplication(sys.argv) window = MainWindow() window.show() sys.exit(app.exec()) |
This is the complete code for this article
|
1 2 3 4 5 6 7 8 9 10 11 12 13 14 15 16 17 18 19 20 21 22 23 24 25 26 27 28 29 30 31 |
import sys from PySide6.QtWidgets import QApplication, QMainWindow, QCheckBox class CheckBox(QCheckBox): def __init__(self, title, parent=None): super().__init__(title, parent) self.setChecked(True) self.stateChanged.connect(self.checkboxStateChanged) def checkboxStateChanged(self, state): print(f"Checkbox state changed to {state}") class MainWindow(QMainWindow): def __init__(self): super().__init__() self.setGeometry(100, 100, 250, 100) self.setWindowTitle("Checkbox Example") self.MyUI() def MyUI(self): checkbox = CheckBox("Select me", self) checkbox.move(10, 10) if __name__ == "__main__": app = QApplication(sys.argv) window = MainWindow() window.show() sys.exit(app.exec()) |
Run your code and you will see Python PySide6 CheckBox

