In this article we want to learn How to Use Designer in Python PySide6, PySide6 Designer is visual editor for creating user interfaces with PySide6. It allows you to design and lay out graphical user interfaces (GUIs) using a drag-and-drop interface, and generate Python code that you can use to create your GUI applications. In this lesson, we are going to introduce PySide6 Designer and show you how to create a simple user interface.
These are step by step instruction that how you can use Designer in PySide6.
Step 1: Install PySide6
Before we can use PySide6 Designer we need to install the PySide6 module. we can install it using pip, we already have installed PySide6.
Step 2: Launch PySide6 Designer
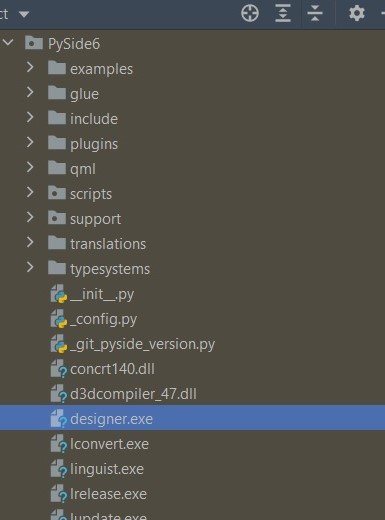
Once PySide6 is installed, you can launch PySide6 Designer by running the designer command in your terminal or command prompt, make sure that you have already added the designer path as environmental variable, also you can directly find PySide6 designer in your installed PySide6 directory, you need to just go to the site-packages, after that PySide6 folder and in their you have designer.exe.
Step 3: Create a New User Interface
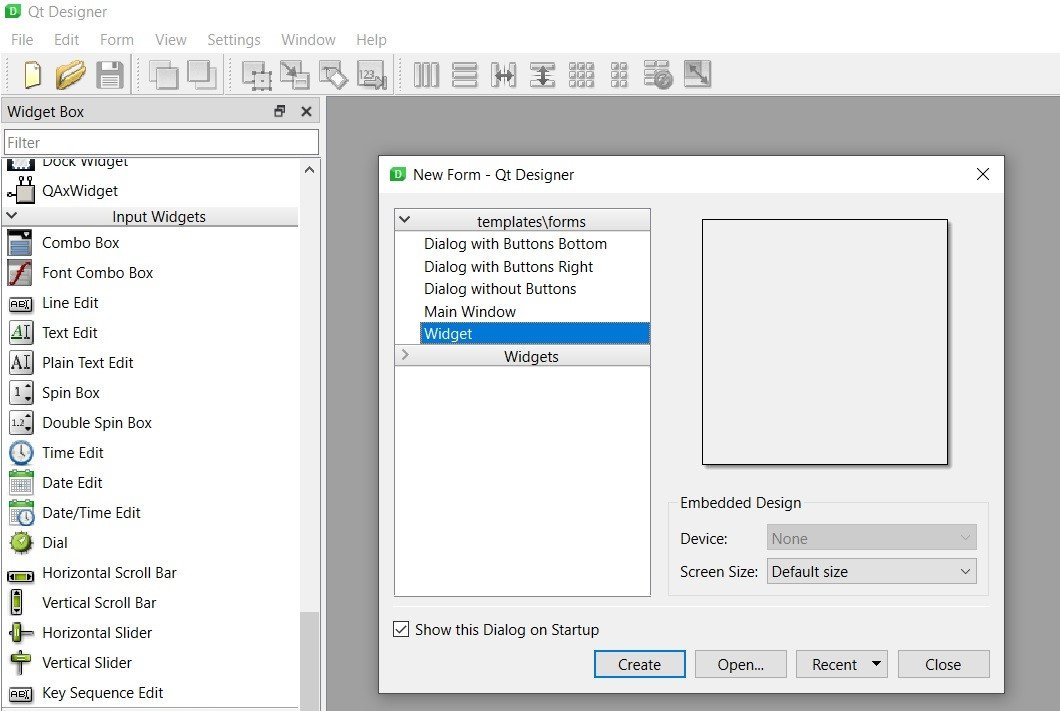
for creating new user interface we need to click on “File” in the menu bar and select “New Form”. This will open a dialog box where we can select the type of form we want to create. select “Main Window” and click “Create”.
Step 4: Design Your User Interface
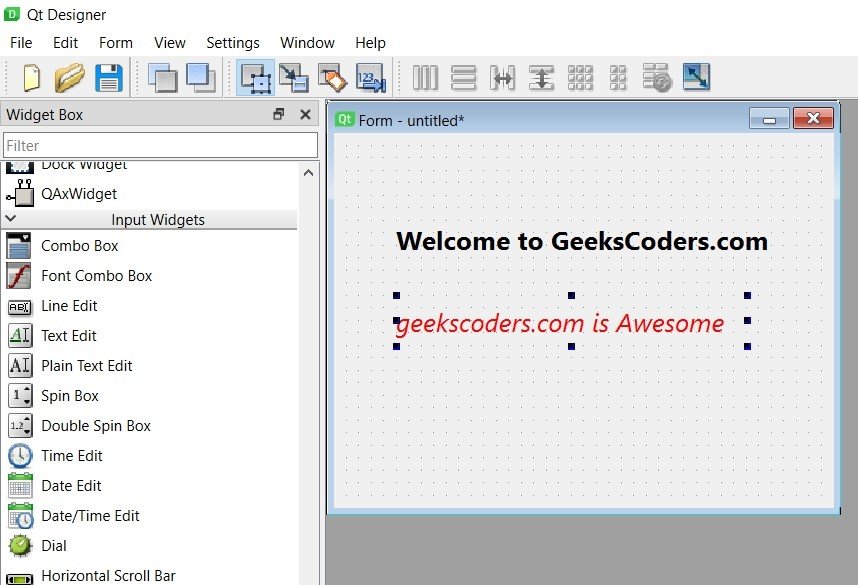
After creating new user interface, we can use tools and widgets in toolbar to design our GUI applications. we can drag and drop widgets in the form and use the properties editor for customizing the properties such as the text, font, and size.
Step 5: Generate Python Code
After you have designed your user interface, you can generate Python code that you can use it for creating your GUI application. for generating the code, click on “File” in the menu bar and select “Save As”. Choose a file name and location for your UI file and save it as a .ui file, for example in our designer we have just added some QLabel.
Step 6: Use the Generated Code in Your Application
For using generated code in application, you need to convert the .ui file to a Python file by using the pyside6-uic command. this command generates python file that contains a class for your user interface.
|
1 |
pyside6-uic myui.ui -o myui.py |
In this example, myui.ui is the name of the .ui file that you saved, and myui.py is the name of the Python module that will be generated.
To use the generated Python code in your application, import the module and create an instance of the generated class:
|
1 2 3 4 5 6 7 |
from PySide6.QtWidgets import QApplication from myui import Ui_MainWindow app = QApplication([]) window = Ui_MainWindow() window.show() app.exec() |
In this example, Ui_MainWindow is the name of the generated class for the main window in our user interface.
Learn More on Python
- Get Started with wxPython: A Complete Guide to Building GUI Applications
- Python: The Most Versatile Programming Language of the 21st Century
- Tkinter: A Beginner’s Guide to Building GUI Applications in Python
- PySide6: The Cross-Platform GUI Framework for Python
- The Ultimate Guide to Kivy: Building Cross-Platform Apps with Python
- Discover the Power of Django: The Best Web Framework for Your Next Project
- How to Earn Money with Python
- Why Flask is the Ideal Micro-Web Framework
- Python Pillow: The Ultimate Guide to Image Processing with Python
- Get Started with Pygame: A Beginner’s Guide to Game Development with Python
- Python PyOpenGL: A Guide to High-Performance 3D Graphics in Python
- The Cross-Platform Game Development Library in Python
- Unleash the Power of Computer Vision with Python OpenCV
- PyQt6 Charts: An Overview and its Importance in Data Visualization
- Maximizing Your Productivity with Python and Excel
Final Thoughts
In this article, we have introduced PySide6 Designer and showed how to create a simple user interface using the drag and drop interface. we also have learned how to generate python code from your user interface and use it in your PySide6 application. With PySide6 Designer you can quickly and easily creates graphical user interfaces for your applications, even if you have little or no experience with GUI programming.
