In this PyQt5 OpenCV article we are going to talk about How to Integrate PyQt5 with OpenCV, PyQt5 is popular Python library used for creating graphical user interfaces (GUIs). on the other hand OpenCV is widely used computer vision library that provides tools for image and video processing. by integrating these two libraries we can create powerful applications for video and image processing, In this article, we will discuss how to integrate PyQt5 with OpenCV.
How to Integrate PyQt5 with OpenCV
First of all we need to install OpenCV and PyQt5
|
1 |
pip install PyQt5 |
|
1 |
pip install opencv-python |
So now this is the complete code for this article
|
1 2 3 4 5 6 7 8 9 10 11 12 13 14 15 16 17 18 19 20 21 22 23 24 25 26 27 28 29 30 31 32 33 34 35 36 37 38 39 40 41 |
import cv2 from PyQt5.QtGui import QPixmap, QImage from PyQt5.QtWidgets import QApplication, QMainWindow, QLabel, QPushButton, QVBoxLayout, QWidget class ImageWidget(QLabel): def __init__(self): super().__init__() def set_image(self, image): qimage = QImage(image.data, image.shape[1], image.shape[0], QImage.Format_RGB888) pixmap = QPixmap.fromImage(qimage) self.setPixmap(pixmap) def process_image(image_path): image = cv2.imread(image_path) processed_image = cv2.cvtColor(image, cv2.COLOR_BGR2GRAY) return processed_image class MainWindow(QMainWindow): def __init__(self): super().__init__() self.image_widget = ImageWidget() self.setCentralWidget(self.image_widget) self.setWindowTitle("GeeksCoders - PyQt5 with OpenCV") button = QPushButton("Process Image") button.clicked.connect(self.process_image) self.toolbar = self.addToolBar("Main Toolbar") self.toolbar.addWidget(button) def process_image(self): image_path = "icon.png" processed_image = process_image(image_path) self.image_widget.set_image(processed_image) if __name__ == "__main__": app = QApplication([]) main_window = MainWindow() main_window.show() app.exec_() |
In the above code cv2 library is imported to read and process images using OpenCV. QPixmap and QImage classes are imported from PyQt5.QtGui to handle image display, and QApplication, QMainWindow, QLabel, QPushButton, QVBoxLayout and QWidget are imported from PyQt5.QtWidgets to create the GUI.
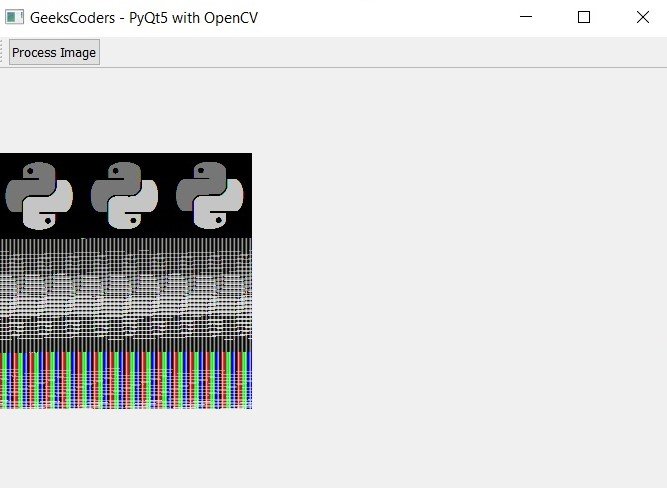
ImageWidget class is defined to display the processed image in the GUI. set_image method sets the image displayed in the QLabel to the processed image by converting NumPy ndarray to QImage object and then creating QPixmap object from the QImage.
process_image function reads an image file using cv2.imread, converts it to grayscale using cv2.cvtColor, and returns the processed image as NumPy ndarray.
MainWindow class is defined to create the main window of the application. process_image method is called when the button is clicked, and it sets the processed image in the ImageWidget using the set_image method.
an at the end if __name__ == __main__ block creates QApplication and MainWindow objects, shows main window and starts the event loop with app.exec_().
Run the code and this will be the result

Learn More on Python
- How to Integrate PyQt6 with OpenCV
- How to Create Button in Python & PySide6
- How to Use Qt Designer with PySide6
- How to Add Icon to PySide6 Window
- How to Load UI in Python PySide6
- How to Create RadioButton in PySide6
- How to Create ComboBox in PySide6
- How to Create CheckBox in Python PySide6
- Responsive Applications with PyQt6 Multithreading
- Event Handling in Python and PyQt6
- How to Use Stylesheets in Python PyQt6
