In this lesson we want to learn about PyQt6 Widgets with Examples, in this article we will learn about some basic widgets in PyQt6 with Examples.
What is PyQt6 ?
PyQt is set of Python bindings for the Qt application framework and runs on all platforms supported by Qt including Windows, OS X, Linux, iOS and Android. PyQt6 is set of Python bindings for Qt6 and provides a way to create graphical user interfaces (GUIs) with Python. In this lesson we are going to take a look at some of the widgets in PyQt6 and provide examples of how to use them.
- QLabel Widget: The QLabel widget is used to display text or an image. this is an example of how to create QLabel widget:
|
1 2 3 4 5 6 7 |
import sys from PyQt6.QtWidgets import QApplication, QLabel app = QApplication(sys.argv) label = QLabel("Hello, PyQt6!") label.show() sys.exit(app.exec()) |
In this example we have imported the necessary modules from PyQt6 and created QApplication object. after that we creates a QLabel widget and set its text to “Hello PyQt6!”. the show() method is used to display the widget and the exec() method is used to run the application.
Run the complete code and this will be the result.

- QPushButton Widget: The QPushButton widget is used to create buttons in GUI. This is an example of how to create QPushButton widget:
|
1 2 3 4 5 6 7 |
import sys from PyQt6.QtWidgets import QApplication, QPushButton app = QApplication(sys.argv) button = QPushButton("Click Me!") button.show() sys.exit(app.exec()) |
In this example, we have created QPushButton widget and set its text to “Click Me!”. The button can be clicked by the user to perform an action.
Run the complete code and this will be the result.

- QTextEdit Widget: The QTextEdit widget is used to create multi line text editor. this is an example of how to create QTextEdit widget:
|
1 2 3 4 5 6 7 |
import sys from PyQt6.QtWidgets import QApplication, QTextEdit app = QApplication(sys.argv) text_edit = QTextEdit() text_edit.show() sys.exit(app.exec()) |
In this example we have created QTextEdit widget and display it on the screen. the user can enter text into the widget, and it can be used to display formatted text as well.
Run the complete code and this will be the result.

- QLineEdit Widget: The QLineEdit widget is used to create single line text editor. this is an example of how to create QLineEdit widget:
|
1 2 3 4 5 6 7 |
import sys from PyQt6.QtWidgets import QApplication, QLineEdit app = QApplication(sys.argv) line_edit = QLineEdit() line_edit.show() sys.exit(app.exec()) |
In this example, we have created QLineEdit widget and display it on the screen. the user can enter text into the widget and it can be used to get input from the user.
Run the complete cod and this will be the result.

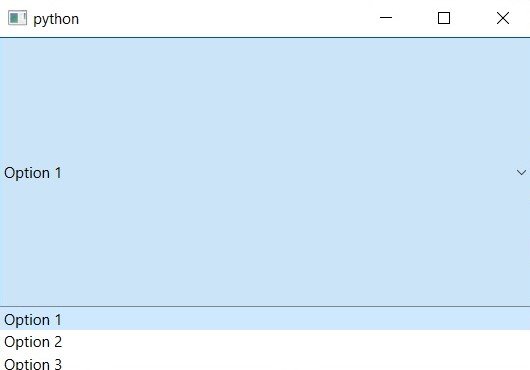
- QComboBox Widget: The QComboBox widget is used to create drop-down list. this is an example of how to create QComboBox widget:
|
1 2 3 4 5 6 7 8 |
import sys from PyQt6.QtWidgets import QApplication, QComboBox app = QApplication(sys.argv) combo_box = QComboBox() combo_box.addItems(["Option 1", "Option 2", "Option 3"]) combo_box.show() sys.exit(app.exec()) |
In this example, we have created QComboBox widget and add some options to it using the addItems() method. The user can select an option from the drop-down list.
Run the code and this will be the result.

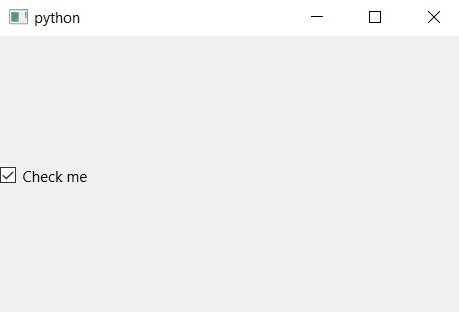
- QCheckBox Widget: The QCheckBox widget is used to create checkboxes. this is an example of how to create QCheckBox widget:
|
1 2 3 4 5 6 7 |
import sys from PyQt6.QtWidgets import QApplication, QCheckBox app = QApplication(sys.argv) check_box = QCheckBox("Check me") check_box.show() sys.exit(app.exec()) |
In this example, we create a QCheckBox widget and set its text to “Check me”. The user can check or uncheck the box to perform an action.
Run the complete code and this will be the result.

- QRadioButton Widget: The QRadioButton widget is used to create radio buttons. Here’s an example of how to create a QRadioButton widget:
|
1 2 3 4 5 6 7 8 9 10 11 12 |
import sys from PyQt6.QtWidgets import QApplication, QRadioButton, QButtonGroup app = QApplication(sys.argv) button_group = QButtonGroup() radio_button_1 = QRadioButton("Option 1") radio_button_2 = QRadioButton("Option 2") button_group.addButton(radio_button_1) button_group.addButton(radio_button_2) radio_button_1.show() radio_button_2.show() sys.exit(app.exec()) |
In this example, we create two QRadioButton widgets and add them to a QButtonGroup. This ensures that only one radio button can be selected at a time.
Run the code and this will be the result.

These are just a few examples of the many widgets available in PyQt6. By combining these widgets, you can create a wide range of graphical user interfaces for your applications.
Final Thoughts
PyQt6 provides way to create graphical user interfaces with Python and offers different widgets for building complex and dynamic GUIs. if you are beginner or experienced programmer than PyQt6 is the best choice for you.
Learn More on Python
-
- Get Started with wxPython: A Complete Guide to Building GUI Applications
- Python: The Most Versatile Programming Language of the 21st Century
- Tkinter: A Beginner’s Guide to Building GUI Applications in Python
- PySide6: The Cross-Platform GUI Framework for Python
- The Ultimate Guide to Kivy: Building Cross-Platform Apps with Python
- Discover the Power of Django: The Best Web Framework for Your Next Project
- How to Earn Money with Python
- Why Flask is the Ideal Micro-Web Framework
- Python Pillow: The Ultimate Guide to Image Processing with Python
- Get Started with Pygame: A Beginner’s Guide to Game Development with Python
- Python PyOpenGL: A Guide to High-Performance 3D Graphics in Python
- The Cross-Platform Game Development Library in Python
- Unleash the Power of Computer Vision with Python OpenCV
- PyQt6 Charts: An Overview and its Importance in Data Visualization
