In this Python PySide6 we want to learn about How to Create QLCDNumber in Python PySide6, so PySide6 is powerful Python library that allows developers to create user interfaces for desktop applications. one of the widgets that PySide6 provides is QLCDNumber, which is used to display numerical values in digital format. in this article we want to learn how to create QLCDNumber in PySide6.
How to Create QLCDNumber in Python PySide6
First of all we need to install PySide6 and you can use pip for the installation
|
1 |
pip install pyside6 |
After installation we need to import required modules and classes
|
1 2 |
import sys from PySide6.QtWidgets import QApplication, QLCDNumber |
In the above code we have imported sys library, which provides access to some variables used or maintained by the interpreter and to functions that interact strongly with the interpreter. we have also imported QApplication class which is required to create PySide6 application, and QLCDNumber class which is used to create QLCDNumber widget.
Now that we have imported necessary libraries, we can create the QLCDNumber widget, use this code for that.
|
1 2 3 4 5 |
app = QApplication(sys.argv) lcd = QLCDNumber() lcd.display(1234) lcd.show() sys.exit(app.exec()) |
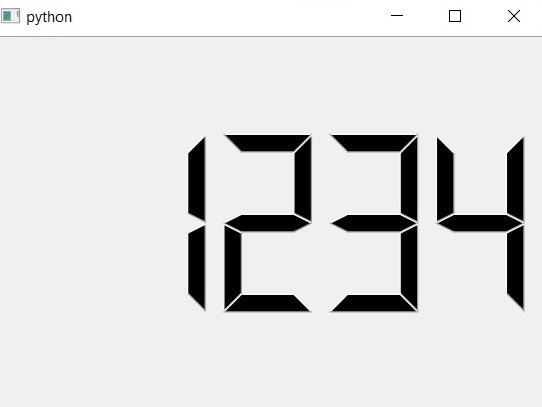
In the above code we have created Python PySide6 application by instantiating QApplication class. after that we have created QLCDNumber widget by instantiating the QLCDNumber class. we set the initial value of the widget to 1234 using display() method. and finally we show the widget on the screen and start event loop by calling the exec() method of the application object.
This is the complete code for this article
|
1 2 3 4 5 6 7 8 |
import sys from PySide6.QtWidgets import QApplication, QLCDNumber app = QApplication(sys.argv) lcd = QLCDNumber() lcd.display(1234) lcd.show() sys.exit(app.exec()) |
Run the complete code and this is the result
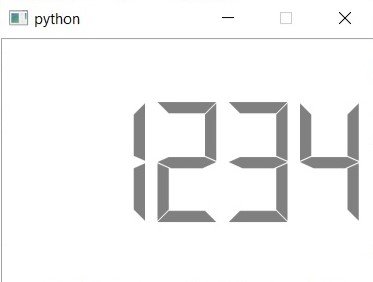
You can also customize QLCDNumber widget to according to your choice. for example you can change the color of the display, change size of the widget, and so on. this is an example of how to change the color of display:
|
1 2 3 4 5 6 7 8 9 10 11 12 13 14 15 16 17 18 19 20 |
import sys from PySide6.QtWidgets import QApplication, QLCDNumber from PySide6.QtCore import Qt from PySide6.QtGui import QPalette app = QApplication(sys.argv) lcd = QLCDNumber() lcd.setSegmentStyle(QLCDNumber.Flat) lcd.setFixedSize(300, 200) palette = lcd.palette() palette.setColor(QPalette.WindowText, Qt.darkGray) palette.setColor(QPalette.Window, Qt.white) palette.setColor(QPalette.Light, Qt.white) palette.setColor(QPalette.Dark, Qt.gray) lcd.setPalette(palette) lcd.display(1234) lcd.show() sys.exit(app.exec()) |
Run the code and this is the result
This is the same code in Python OOP
|
1 2 3 4 5 6 7 8 9 10 11 12 13 14 15 16 17 18 19 20 21 22 23 24 25 26 27 28 29 30 31 32 33 34 35 36 |
import sys from PySide6.QtWidgets import QApplication, QMainWindow, QLCDNumber from PySide6.QtCore import Qt class MyWindow(QMainWindow): def __init__(self): super().__init__() # Set window properties self.setWindowTitle('QLCDNumber Example') self.setGeometry(100, 100, 300, 200) # Create QLCDNumber widget self.lcd = QLCDNumber(self) self.lcd.setSegmentStyle(QLCDNumber.Flat) self.lcd.setFixedSize(150, 50) palette = self.lcd.palette() palette.setColor(palette.WindowText, Qt.darkGray) palette.setColor(palette.Window, Qt.white) palette.setColor(palette.Light, Qt.white) palette.setColor(palette.Dark, Qt.gray) self.lcd.setPalette(palette) self.lcd.display(1234) self.lcd.move(75, 75) if __name__ == '__main__': # Create PySide6 application app = QApplication(sys.argv) # Create main window window = MyWindow() window.show() # Run event loop sys.exit(app.exec()) |
In the above code we have created MyWindow class that extends from QMainWindow class. in the __init__ method of MyWindow class, we have set window properties and create the QLCDNumber widget. also we have customized the widget using setSegmentStyle, setFixedSize and setPalette methods.
For creating PySide6 application we have instantiated QApplication class, created an instance of the MyWindow class, and show the window using the show method. and finally we started the event loop by calling app.exec().
Learn More on Python GUI
- How to Create Label in PySide6
- How to Create Button in Python & PySide6
- How to Use Qt Designer with PySide6
- How to Add Icon to PySide6 Window
- How to Load UI in Python PySide6
- How to Create RadioButton in PySide6
- How to Create ComboBox in PySide6
- How to Create CheckBox in Python PySide6
- Responsive Applications with PyQt6 Multithreading
- Event Handling in Python and PyQt6
- How to Use Stylesheets in Python PyQt6