In this Python PySide6 article we are going to talk about Python PySide6 Graphics , Python is high level programming language that has become increasingly popular in recent years due to its easiness and flexibility, and PySide6 is Python binding for the cross platform Qt framework which provides developers with an extensive set of tools for building applications with sophisticated graphical interfaces. in this article we want to learn how to create graphics in Python PySide6.
What is PySide6 ?
PySide6 provides a module called QtGui which includes classes for creating and manipulating graphical objects. one of the most basic graphical objects is line which can be created using QLineF class. following code shows how to create a line and display it in PySide6 application:
|
1 2 3 4 5 6 7 8 9 10 11 12 13 14 15 |
from PySide6.QtGui import QPen from PySide6.QtWidgets import QApplication, QGraphicsScene, QGraphicsView from PySide6.QtCore import QLineF, Qt app = QApplication([]) scene = QGraphicsScene() line = QLineF(0, 0, 100, 100) pen = QPen() pen.setWidth(2) pen.setColor(Qt.red) scene.addLine(line, pen) view = QGraphicsView(scene) view.setWindowTitle("GeeksCoders.com") view.show() app.exec() |
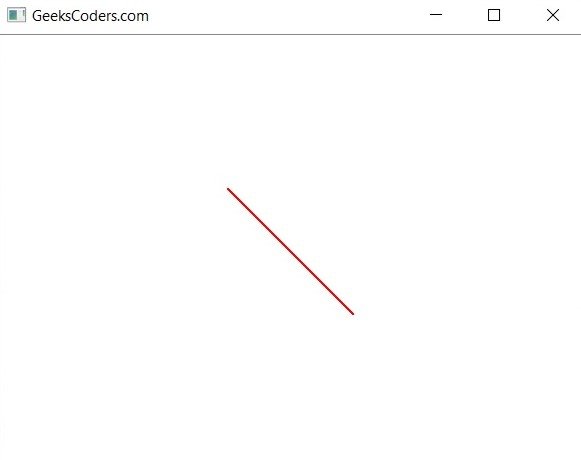
In the above code we have imported necessary classes from the QtGui and QtWidgets modules. after that we have created QApplication object which is required for all PySide6 applications. after that we have createed QGraphicsScene object which represents the canvas on which graphical objects are drawn. we creates QLineF object representing a line from (0, 0) to (100, 100). we also creates a QPen object which is used to set the width and color of the line. after that we have added the line to the scene using the addLine method passing in the line and pen objects. and finally we create QGraphicsView object to display the scene and call the show method to display the window.
Run the code and this will be the result

Another common graphical object is rectangle which can be created using QRectF class. following code shows how to create a rectangle and display it in Python PySide6 application:
|
1 2 3 4 5 6 7 8 9 10 11 12 13 14 15 16 17 18 |
from PySide6.QtGui import QBrush, QPen, QColor from PySide6.QtWidgets import QApplication, QGraphicsScene, QGraphicsView from PySide6.QtCore import QRectF, Qt app = QApplication([]) scene = QGraphicsScene() rect = QRectF(0, 0, 100, 100) pen = QPen() pen.setWidth(2) pen.setColor(QColor(255, 0, 0)) brush = QBrush() brush.setColor(QColor(0, 255, 0)) brush.setStyle(Qt.DiagCrossPattern) scene.addRect(rect, pen, brush) view = QGraphicsView(scene) view.setWindowTitle("GeeksCoders.com - Rectangle") view.show() app.exec() |
In this code we have imported the necessary classes from QtGui and QtWidgets modules. after that we have created QApplication object and QGraphicsScene object as. we creates QRectF object representing a rectangle with top left corner at (0, 0) and width and height of 100. we also creates QPen object to set the color and width of the rectangle’s outline and QBrush object to set the fill color and style of the rectangle. we added the rectangle to the scene using addRect method passing in the rectangle, pen and brush objects. and finally we creates QGraphicsView object to display the scene and show the window.
Run the code and this will be the result

PySide6 also provides many other graphical objects such as ellipses, arcs, polygons and curves as well as more advanced features such as transformations, animations and custom graphics items. by using PySide6 developers can create rich and interactive graphical applications with easy and it makes Python an ideal choice for graphical development tasks.
Learn More on Python GUI
- How to Create Print Dialog in PySide6
- How to Create Button in Python & PySide6
- How to Use Qt Designer with PySide6
- How to Add Icon to PySide6 Window
- How to Load UI in Python PySide6
- How to Create RadioButton in PySide6
- How to Create ComboBox in PySide6
- How to Create CheckBox in Python PySide6
- Responsive Applications with PyQt6 Multithreading
- Event Handling in Python and PyQt6
- How to Use Stylesheets in Python PyQt6
