In this Python PyQt6 article we want to talk about Qt Designer Tool in Python PyQt6, Qt Designer is powerful tool for creating user interfaces in PyQt6, one of the most popular Python GUI frameworks. with Qt Designer you can visually design and lay out your user interface using drag and drop interface without writing any code. in this article we want explore some of the key features of Qt Designer and how to use it to create user interfaces for your Python applications.
Qt Designer Tool in Python PyQt6
First of all you need to install PyQt6
|
1 |
pip install PyQt6 |
By default we don’t have Qt Designer in PyQt6, we need to install PyQt6 Tools.
|
1 |
pip install pyqt6-tools |
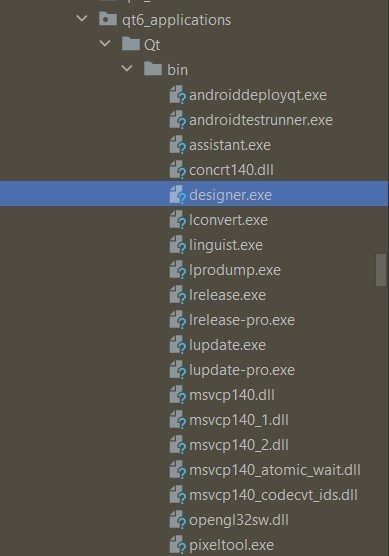
After installation you can find Qt Designer in qt6_applications folder.

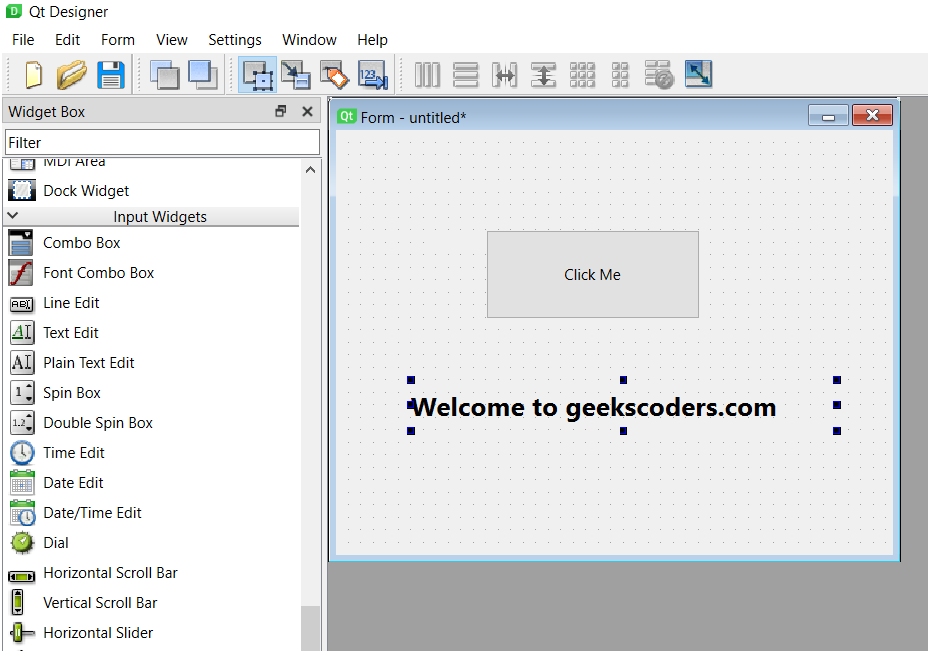
Let’s create simple user interface using Qt Designer. we want to create a window with label and button. start by dragging QWidget widget onto the window. this will be main window of our application. after that drag QLabel and QPushButton widget onto the main window. position and resize the widgets as desired.

When you are done, save your user interface to a file with .ui extension. after that you can use uic module in PyQt6 to convert the .ui file to Python code that you can use in your application.
|
1 |
$ pyuic6 -x simpleui.ui -o simpleui.py |
After that the ui file will be converted to py, and this will be the converted code
|
1 2 3 4 5 6 7 8 9 10 11 12 13 14 15 16 17 18 19 20 21 22 23 24 25 26 27 28 29 30 31 32 33 34 35 36 37 38 39 40 41 42 43 44 45 46 47 |
# Form implementation generated from reading ui file # 'simpleui.ui' # # Created by: PyQt6 UI code generator 6.2.0 # # WARNING: Any manual changes made to this file # will be lost when pyuic6 is # run again. Do not edit this file unless you # know what you are doing. from PyQt6 import QtCore, QtGui, QtWidgets class Ui_Form(object): def setupUi(self, Form): Form.setObjectName("Form") Form.resize(446, 340) self.pushButton = QtWidgets.QPushButton(Form) self.pushButton.setGeometry(QtCore.QRect(120, 80, 171, 71)) self.pushButton.setObjectName("pushButton") self.label = QtWidgets.QLabel(Form) self.label.setGeometry(QtCore.QRect(60, 200, 341, 41)) font = QtGui.QFont() font.setPointSize(16) font.setBold(True) self.label.setFont(font) self.label.setObjectName("label") self.retranslateUi(Form) QtCore.QMetaObject.connectSlotsByName(Form) def retranslateUi(self, Form): _translate = QtCore.QCoreApplication.translate Form.setWindowTitle(_translate("Form", "Form")) self.pushButton.setText(_translate("Form", "Click Me")) self.label.setText(_translate("Form", "Welcome to geekscoders.com")) if __name__ == "__main__": import sys app = QtWidgets.QApplication(sys.argv) Form = QtWidgets.QWidget() ui = Ui_Form() ui.setupUi(Form) Form.show() sys.exit(app.exec()) |
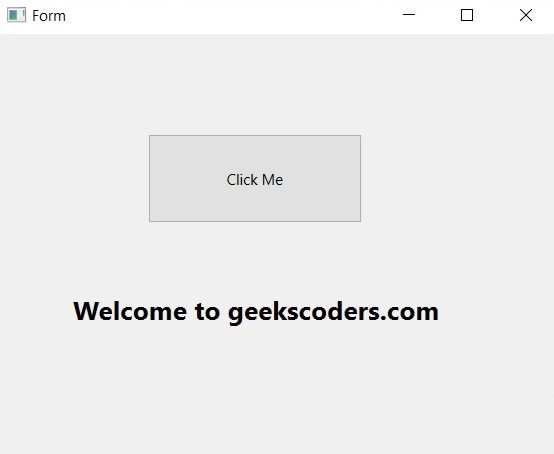
Run the code and this is the result

In this article we have explored some of the key features of Qt Designer and how to use it to create user interfaces for your Python applications. with Qt Designer you can create complex user interfaces using drag and drop interface without writing any code. after that you can convert your user interface to Python code using the uic module and connect your widgets to Python code using the connect() method. with these tools you can create powerful and flexible user interfaces for your Python applications.
Learn More on Python GUI
- How to Create Print Dialog in PySide6
- How to Create Button in Python & PySide6
- How to Use Qt Designer with PySide6
- How to Add Icon to PySide6 Window
- How to Load UI in Python PySide6
- How to Create RadioButton in PySide6
- How to Create ComboBox in PySide6
- How to Create CheckBox in Python PySide6
- Responsive Applications with PyQt6 Multithreading
- Event Handling in Python and PyQt6
- How to Use Stylesheets in Python PyQt6
